skip to main |
skip to sidebar
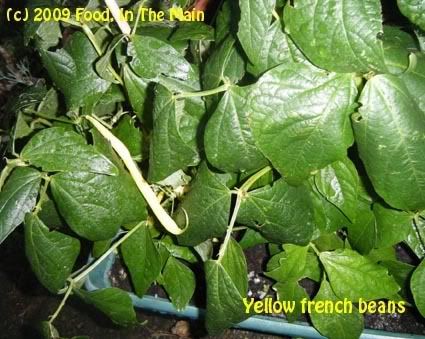 Dwarf yellow French beans... just three plants but they've bean - er, been - providing a good handful of beans every week. I LOVE fresh French beans!
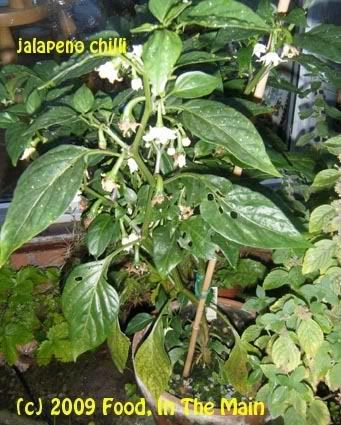
Jalapeno chilli plant. VERY slow growing... it still hasn't fruited although there are flowers. Hopefully next summer will see a harvest - IF I can keep the plant alive over winter.
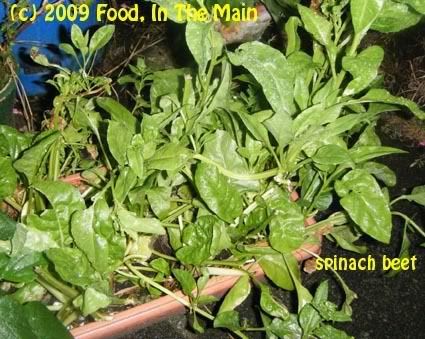
Spinach beet greens. Nothing to do with beetroot - they're just a variety of spinach.
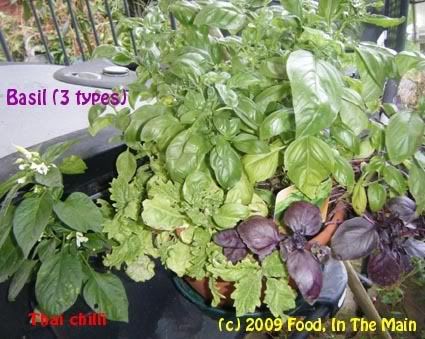
Part of my herb collection - three types of basil... purple basil, sweet basil and another variety I know not the name of, but which is quite peppery. Oh, and a Thai chilli plant on the left. Needs transplanting to a bigger pot.
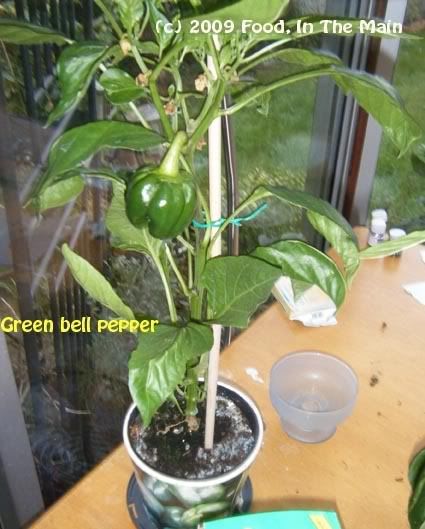
My green bell pepper plant. Do they survive the winter? Or are they the kind that need planting afresh every year? Dont know but probably will get to find out!

A red bell pepper plant. This is a cheat, really, I didnt grow it from scratch, but Pete won the plant at a charity auction because I'd had my eye on it :)
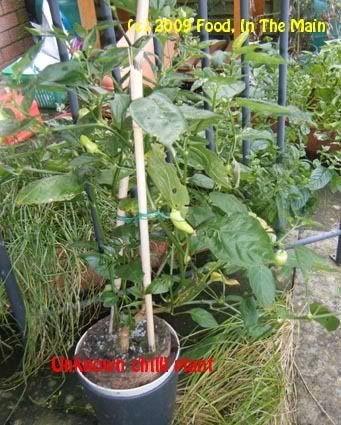
Chilli plant. The one that makes fresh looking green chillies without any heat. But at least it's prolific!
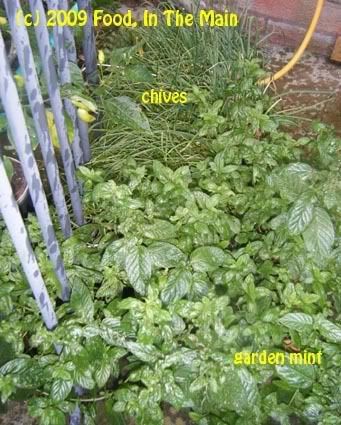
Garden mint and chives. I love the chives - they're so hardy and dont need looking after. They just grow back every spring!
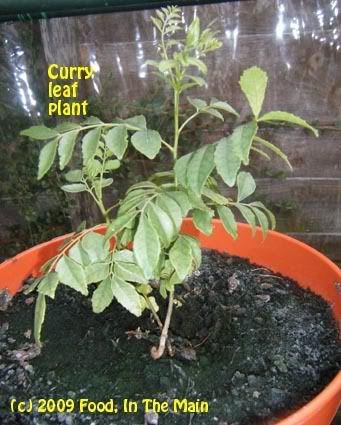
My most prized plant of them all - my CURRY LEAF PLANT! It's going to overwinter indoors, on my bedroom windowsill, in the warmth.
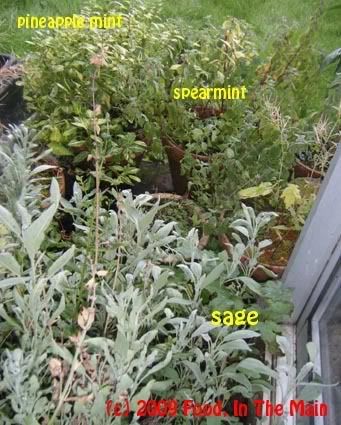
Sage, which is growing madly this year. And in the background, my pineapple mint and spearmint plants.
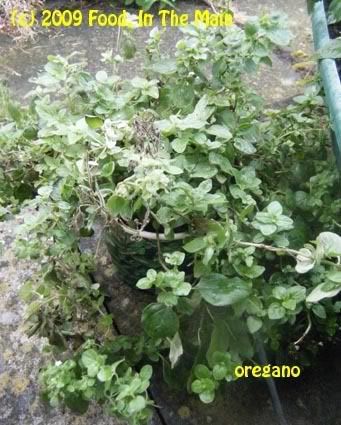
Oregano. One herb that sure loves its water! Miss out even one hot day of watering, and it droops sadly.
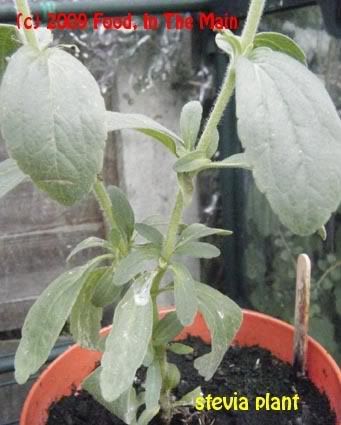
Stevia plant (yes, the sugar substitute Stevia). Apparently the leaves can be used to sweeten drinks like tea, although I havent tried this yet. Anybody know how to actually make use of this plant?
This recipe is one that I overlooked posting, for one reason or another, although I made it a few months ago. My most favourite kind of gourd (or pumpkin) goes by the Tamil name of vella pooshanikkai (white pumpkin), and is apparently known as ash gourd or winter melon in English. A really rather ravishing halwa is also made with this vegetable, usually served at South Indian wedding feasts – but that is not what I made.
Anyway, ash gourds are not available north of London, as far as I’m concerned and even then, I think, available only at South Indian or Sri Lankan greengrocers. Since I live in the Midlands (which is not really far north, but is northern enough for Londoners, I’m sure), I can go for years (and have done) without ever laying eyes on an ash gourd.
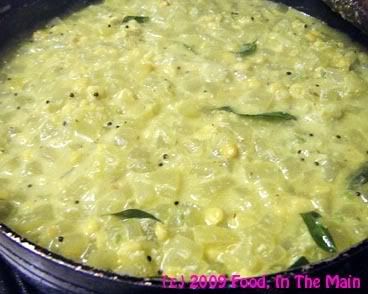
My most favourite thing to make with ash gourds is kootu, cooked with chana dal – an incredibly simple preparation.
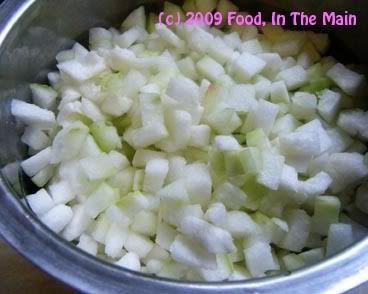
The most work involved is in prepping the vegetable for cooking, by removing the somewhat jelly-like mid-section which contains the seeds and chopping the firm flesh of the gourd into small cubes.
After that, it’s easy peasy. This kootu is versatile (in my house anyway) as a side-dish with sambar and rice, or with chapaties, or over plain rice as a simple meal.
Recipe for: Pooshanikkai (ash gourd) kootu
Ingredients:
2 cups ash gourd, cut into small cubes
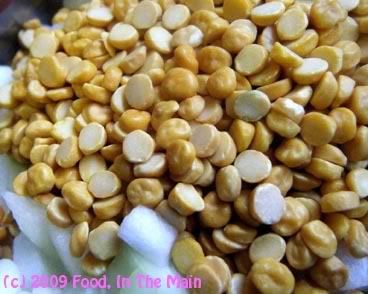
1/2 cup chana dal
1/2 tsp turmeric powder3 tbsp fresh grated coconut
3-4 green chillies
1/2 tsp cumin seeds 1 tbsp rice flour
1 tsp mustard seeds
2 tsp urad dal
5-6 fresh curry leaves
1 tsp oil 1/4 tsp asafetida powder
Salt to taste
Method:
1. Put the chana dal at the bottom of a pressure-cooker-safe vessel, add the cut ash gourd pieces and the turmeric powder, and 3/4 cup water.

2. Pressure-cook this for 3 whistles, let the pressure reduce naturally. The ash gourd pieces will be translucent when the cooker is opened. 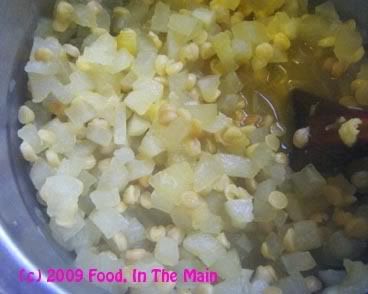
3. Grind the coconut, green chillies, rice flour and cumin seeds to a smooth paste using 3-4 tbsp hot water. 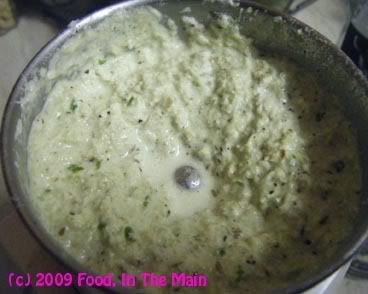
4. In a pan, heat the oil and add the mustard seeds, asafoetida powder, urad dal and curry leaves and let them fry till the seeds pop and the dal is golden brown (30-40 seconds). 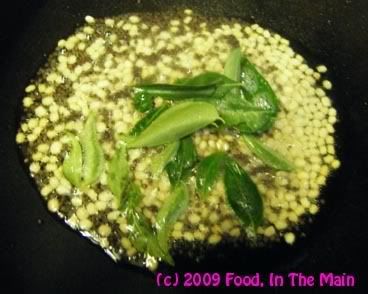
5. Carefully pour the cooked pumpkin/gourd along with the cooking water into the pan and stir well. 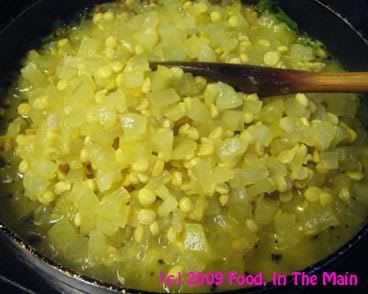
6. Now add the ground coconut paste and stir it in along with salt to taste. Add a little more water if required (depending on the consistency you want for the kootu.)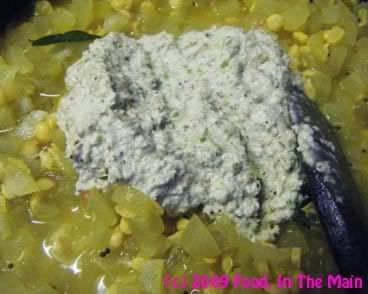
Bring the kootu to a gentle boil and simmer for 2-3 minutes. Serve hot.
There is a slight – very slight – downside to growing your own herbs… the fact that there is so MUCH of them to use up during the growing season. The fact that most herbs are seasonal and die down during the winter is another pinprick to my gardening soul – if only because of the guilt of not using them as much as possible. You know, the sort of guilt generated by an inner voice that goes “You complained about not having your own herbs, now you have them you’re not using them, you’re letting them go waste, use 'em up, use 'em up, use 'em upppp!”).
Much as I love my fresh herbs, coriander is the one that I use the most and can’t grow enough of, especially as it is not the “cut and come again” kind of herb. I do grow maybe a couple of batches of coriander in the summer, but it’s usually quicker and more convenient to just buy a bunch from the supermarket.
Other herbs which I use reasonably frequently are basil, chives and mint. I have three kinds of mint and like I’ve said before, this year they’re growing wild. If they were not container-grown, they would probably have taken over the entire backyard – possibly like triffids, only fresh smelling (and also not poisonously carnivorous, unlike triffids).
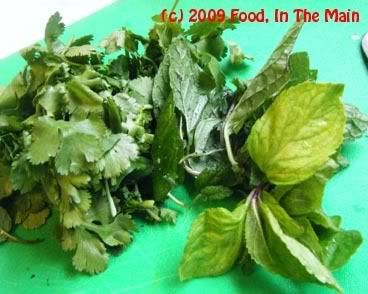
Anyway, I’ve been using up more mint this summer than I ever have before, in an effort to quieten my brain’s guilty yammering and make use of at least some of the bounty – mint chutney, minty rice in several forms, salads, and so on. I made this rice a short while back, using up the last of my own fresh coriander, and some of my golden variegated mint. I didn’t make a paste of the herbs this time, just sliced them into as thin ribbons as possible and used them like that – I suppose it made a difference in that the taste was not so in-your-face-herby as when the mint is ground up. .
PS. I’m not so bothered about my mint plants now, as they have started flowering and there are bees, wasps and assorted other insects gorging themselves on the flowers. (Also, the hovering insects make it a bit dicey for me to pick the mint – I’m not brave or stoic about being stung!)
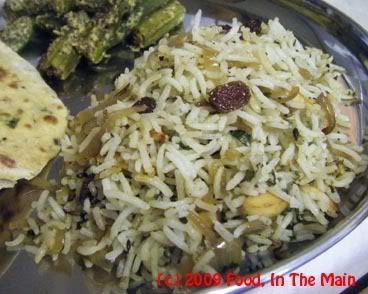
Recipe for: Herby onion rice with almonds
Ingredients:
1 cup basmati rice, soaked for 20 minutes and cooked al dente and cooled2 medium onions + 4 shallots (optional)1/2 cup coriander leaves1/2 cup mint leaves1 tbsp ginger, grated1 tsp cumin seeds2 tbsp skinned slivered almonds 1 tsp coriander powder2 tbsp sultanas
1 tsp oil1 tsp gheeSalt to tasteMethod:
1. Slice and onions and shallots thinly. 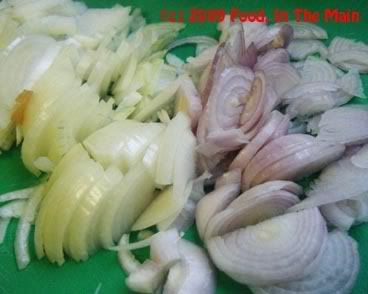
2. In a wide pan, heat 1 tsp oil and add the coriander powder and grated ginger. Fry for 30 seconds or till the ginger goes a darker shade of brown. 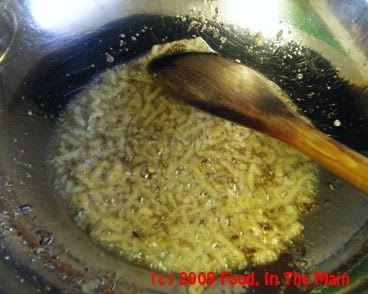
3. Add the sliced onions + shallots and cook them slowly on a medium-low flame with 2 tbsp water,
 till softened and lightly caramelised (about 8 minutes).
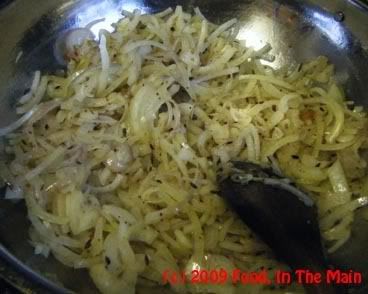
4. Add the chopped herbs along with salt to taste and stir-fry till they wilt. 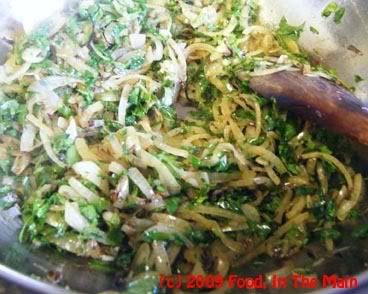
5. Add the cooked rice and gently fold in with a large spatula, taking care not to break or mush up the grains. 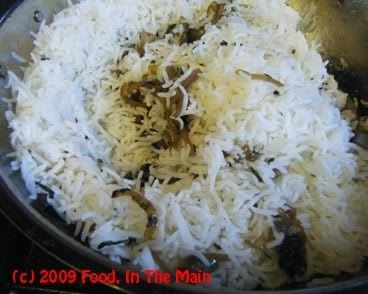
6. In a separate, small pan, heat the tsp of ghee till melted, then add the sultanas and stir till they swell up and go golden brown. Remove from the ghee, squeezing them gently with a spoon against the side of the pan to let the excess ghee drip away. Reserve. 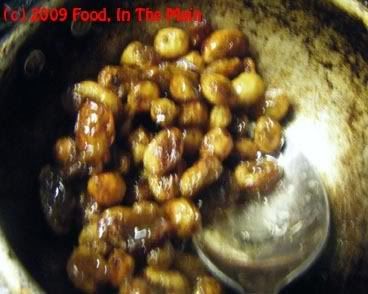
7. To the ghee remaining in the pan, add the cumin seeds and the slivered almonds,
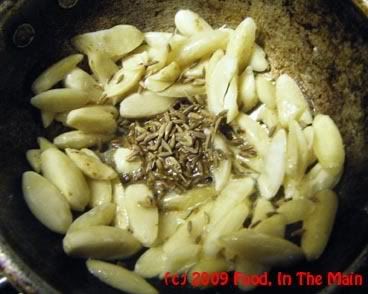
stirring with a spoon till the almonds take on a pale gold colour and the cumin seeds are aromatic. 
7. Add the almonds and sultanas to the rice and mix in. 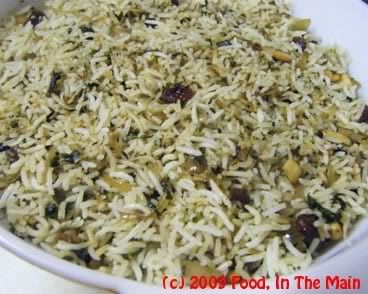 8. Serve hot with a spicy curry.
Last week was a busy one, socially speaking, and we went out for dinner three times in the week – quite out of the norm for me, because I don’t care to eat out much. Or rather, I get easily bored with restaurant food, no matter what the cuisine, so the occasional meal out is much more to my liking than eating out often.
After having been to two “Indian” (read Bangladeshi) restaurants, and one birthday party with a buffet-style spread, both Pete and I were craving simple comfort food. However, the term "comfort food" represents entirely different things to me and Pete – no surprise considering that I was brought up on standard South (and some North) Indian vegetarian cuisine, and Pete on just as standard English fare.
One of my few talents is that I am capable of is making both kinds of comfort food – which ability my husband doesn’t share. (Just as well, otherwise he’d be perfect, and perfection is a quality that I can’t really come to terms with because to me it denotes “smug and/or boring”.)
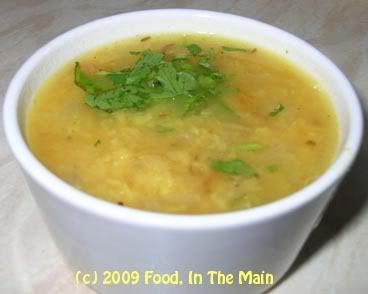
What was I saying? Oh yes, comfort food. Pete’s comfort food is shepherds pie, and mine is home-style simple food, preferably based around rice. So I made shepherds pie for Pete, and for myself, dal – a simple, very basic, fuss-free and gentle-on-the-digestion dal, enlivened by the sharp freshness of lemon juice and aromatic with a tempering of ghee-fried cumin seeds. That dal over plain steamed rice was, for that meal, absolutely perfect.
What? I’m not being contrary. I have nothing against perfection in food - in fact, I try actively to achieve it. Perfection in human beings is what I can’t live with. Are we clear now?
Recipe for: Light gingery lemon dal
Ingredients:
1 cup yellow moong dal
2 small tomatoes, chopped
1 onion, chopped fine
1 tbsp fresh ginger root, grated
1 fresh green chilli, slit vertically from the tip
1/2 tsp oil
1/2 tsp ghee
1 tsp cumin seeds
1/2 tsp coriander powder
2 tbsp lemon juice (or to taste)
Salt to taste
Chopped coriander leaves for garnish
Method:
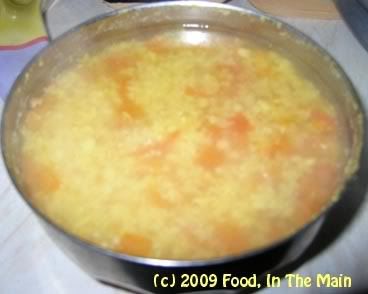
1. Pressure cook the moong dal and chopped tomatoes with 1-1/2 cups water for 3 whistles. Reserve.
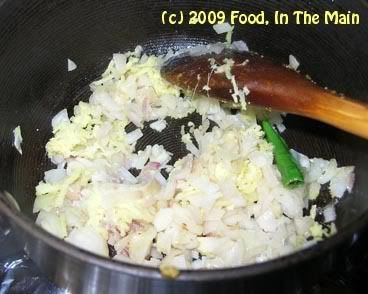
2. Heat 1/2 tsp oil in a pan and add the chopped onions and green chilli. Cook on a low flame till the onions soften. Don't let them brown.
3. When the onions are cooked, add the cooked dal and mix in. On med-high heat, bring the dal to a gentle boil.
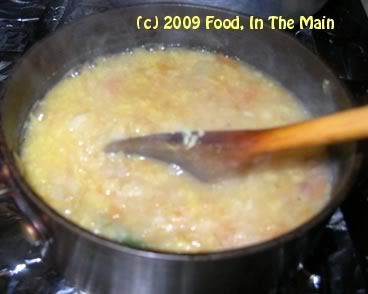
4. Meanwhile, heat the 1/2 tsp ghee in a small pan and add the cumin seeds and coriander powder. Let the seeds turn a darker aromatic brown (about 30 seconds).
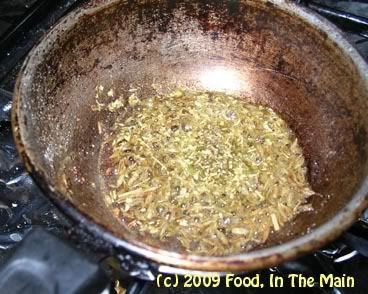
5. Pour this tempering immediately on the bubbling dal and turn off the heat. Add salt to taste and 1 tbsp lemon juice, stir it in and taste for sourness. Add more lemon juice if required.
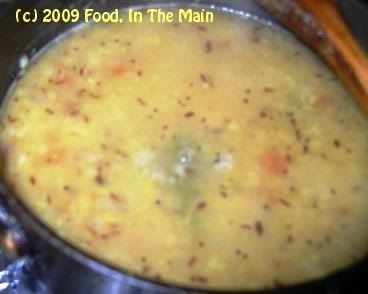
Serve hot over plain boiled rice, with any spicy, dry vegetable preparation.
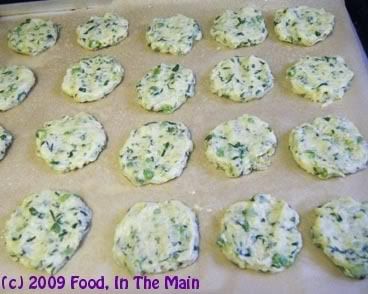
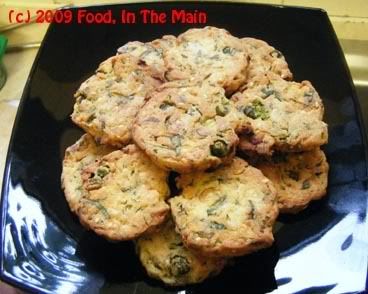
I have a favourite new snack – baked vegetable pakodas (fritters). Granted, they don’t look like traditional pakodas, and possibly they don’t taste traditional either (read “deep-fried”) – but boy, they DO taste really good. Actually you might as well call them savoury cookies because I flattened them for more even baking. Whatever (a rose by any other name and all that...), these are extremely more-ish when fresh, with dips.
These pakodas become kind of chewy and hard the next day, but I liked them that way nevertheless. But then I’m odd like that. So if you're not like me, eat 'em fresh. I dont know if they would soften when re-heated in a microwave, because I didn't try that for myself. (But if you do, let me know what happens, please.)
Recipe for: Baked vegetable pakodas

Ingredients:
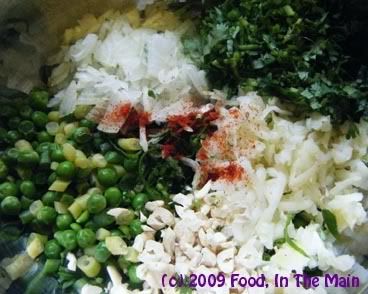
1 small potato, boiled and grated
1/2 cup fresh peas
1/2 cup green beans, chopped 1/2cm thick
1/2 cup spinach leaves, sliced
1 medium onion, chopped fine
10 cashew nuts, chopped
1/4 cup chopped coriander leaves
1/4 tsp cumin powder
1 tbsp sesame seeds
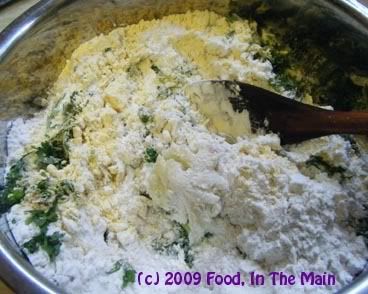
1 cup gramflour (besan/chickpea flour/kadala maavu)
1 cup rice flour
1/2 tsp chilli powder or 2-3 fresh green chillies, minced (optional)
Salt to taste
1 tbsp oil
Water as required
Method:
1. Preheat the oven to 180C.
2. Microwave the green beans and peas for 4 minutes on full power with 4 tbsp water.
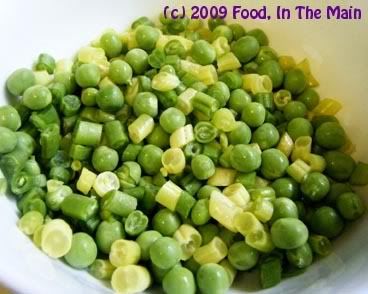
Transfer to a large bowl.
3. Add the grated boiled potato, spinach leaves, chopped onion, cashew nuts, coriander leaves, cumin powder, sesame seeds and mix well.
4. Add the rice flour and gram flour along with salt to taste.
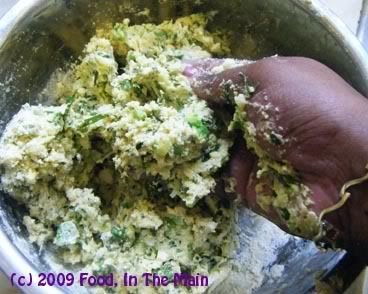
5. Mix with your hand now, adding water little by little until the dough comes together and you can make small balls with it. Do NOT make the dough watery. It should be thick and will be a bit sticky.
6. Heat the oil till it’s smoking, then pour onto the dough.
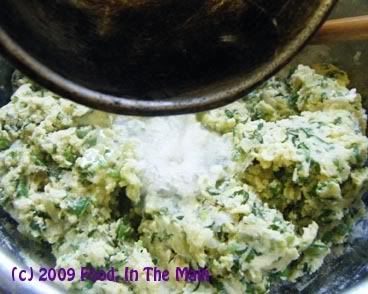
Wait a couple of minutes for it to cool before mixing it into the dough (or use a spatula).
7. Line a couple of baking trays with silicone or non-stick paper and additionally spray it with Pam or similar non-fat spray. Make small balls of the dough, place on the tray and flatten evenly with your fingers. You might need to wipe your fingers clean every so often.
Spray the tops of the pakodas with a spritz of Pam, then bake in a 180C oven for 15 minutes.

After that turn them over, and bake for another 15 minutes or till the pakodas are lightly browned on top.

If you like them to be crisp, bake for a few minutes longer (but keep an eye on them).
8.Serve warm, with or without dips, as a snack.
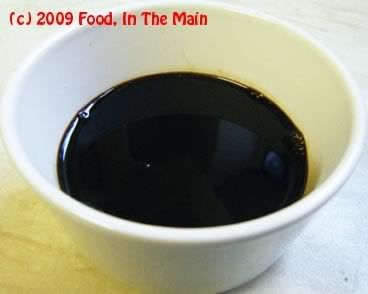
You wouldn’t think that strawberries would pair well with vinegar, would you? Well ok, so it’s not regular vinegar, the kind you’d splash on to your fish and chips (if you ate fish n chips, that is), the kind that is used to pickle onions, etc. It’s balsamic vinegar to which I refer, and that too good quality balsamic vinegar. If you wanted the best quality aged balsamic vinegar, you’d probably have to sell your house to afford it, so I wouldn’t recommend best quality balsamic vinegar - just the good quality balsamic vinegar that costs a few pounds for 250ml, say, from a known brand. I used Balsamic Vinegar of Modena, which I understand is good quality balsamic vinegar.
Ok, now that we have that out of the way (and by the way, I may have qualified for entry into the Guinness Book of World Records for mentioning “balsamic vinegar” the most times in a single paragraph. No, I wasn’t trying to qualify particularly, it’s just one of those lucky things that happen when you mention “balsamic vinegar” many many many many times).
So, my balsamic vinegar from Modena. I had the bottle on my shelf for at least a couple of years – I probably bought it when I read about it but didn't have a clue what to do with it really. So it just sat there in my pantry, probably ageing gracefully. (I like having well-stocked kitchen cupboards - I have more things than I know what to do with, all of which I've bought on the off chance that I might need it for a recipe - because it would be a disaster if I didn't have it when required. Sometimes I think I should just live in a supermarket. That would solve my shelving problems too.)
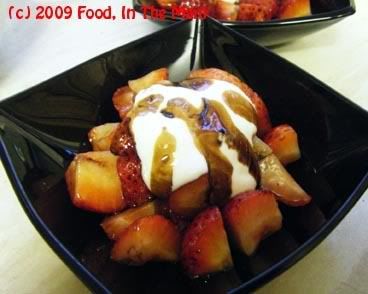
Anyway, my first actual encounter with balsamic vinegar was at a gastropub a few miles from Shrewsbury. I had an absolutely delicious beetroot salad with a balsamic vinegar reduction for a starter - one bite of that salad, and I was hooked. And then I remembered this recipe on one of my favourite blogs, which was a happy coincidence as I had some really lovely Devonshire strawberries - and a beautiful dessert happened.

But, aaaack! I didnt have mascarpone cheese (See, this is why I say I should live in a supermarket - I would definitely have had mascarpone cheese at hand!), and I had to wing it with the best substitute I could think of - fat-free Greek yogurt, which I mixed with a tablespoon of sugar... and my poor-man's mascarpone cheese was created.
I dont think I missed the mascarpone, to be honest - the lightly sweetened yogurt tasted wonderful with the strawberries and balsamic vinegar syrup.
Recipe for: Strawberries with balsamic vinegar syrup
Ingredients:
3 cups (25-30) fresh strawberries, hulled and quartered
1 tbsp vanilla sugar (more or less depending on the sweetness of your berries)
For the syrup:
1/3 cup balsamic vinegar
2 tsp caster sugar
1 tsp fresh lemon juice
To serve:
1/3 cup thick Greek yogurt
2 tsp caster sugar
1 tsp vanilla essence
Method:
1. Sprinkle the vanilla sugar over the strawberries and set it aside for 15-20 minutes.

2. Meanwhile, make the balsamic vinegar syrup. Put the sugar in a small pan, squeeze over the lemon juice.

3. Pour the balsamic vinegar over this and stir. Heat the mixture and let the sugar dissolve, then let the vinegar bubble till it's reduced to a syrup that coats the back of a spoon thickly.

4. Cool the syrup.
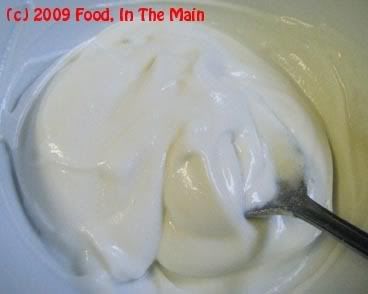
5. Mix the sugar with the Greek yogurt and the vanilla extract
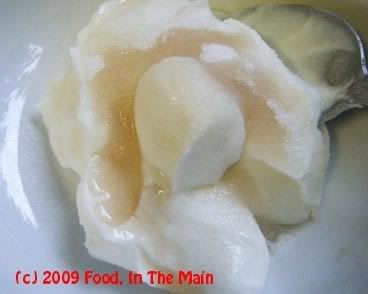
till it's a smooth but still thick "sauce".
To serve, toss the strawberries lightly with a tablespoon of the vinegar syrup, then portion them out into serving bowls. Dollop a tablespoon of the Greek yogurt on top, drizzle with some more syrup and serve.