skip to main |
skip to sidebar
 "Grow Your Own", they say blithely, as if just anybody could grow stuff. Edible, sustaining stuff, I mean. If the event was "Grow Your Own Weeds", I would have beaten everybody else hands down! If wishes were strong enough to bear fruit (and vegetables), I would be buried under a windfall of produce. Unfortunately, wishing does nothing to grow plants… it simply cannot overcome the multiple disadvantages of terrible weather, lack of space, an abundance of leaf-gobbling insects and things and, not the least, my black-fingered efforts at gardening.
Never let it be said that hope doesn’t triumph in the face of adversity, however. Every year, despite the ample evidence of my gardening inability proven by the desiccated brown carcasses of the previous year’s gardening efforts, I plant things in the hope that they will grow. I’m driven by images of succulent fruit and vegetables and herbs that I see on other blogs; even as I rail at the invisible entities that are eating away my growing plants, leaf by leaf, bite by bloody bite, I see myself going out to the garden to get some tomatoes, green beans, peas and potatoes that I’ve grown all by my own self. Alas, they remain dreams, because the reality is that I mostly manage to grow herbs – for a while, that is, before they inexplicably die. And no, it’s not a natural death from herby old age.
Maybe they perish from loneliness, but they shouldn’t. I talk to my plants every day, although I have to admit not always lovingly – sometimes the frustration of having things slowly NOT growing in pots makes me snap. So instead of friendly greetings like “hello plant, how are you today, did you have a good day, I hope the sun shone sweetly on you”, the trend of remarks occasionally is more on the lines of “You! Yes, YOU! You ‘orrible thing! Grow! Laziness wont be tolerated. Use the sunshine, make chlorophyll, put out a few more leaves, fling off any insects, just GROW dammit!”.
Does talking to them – or yelling at them – work? If you’re a black-fingered plant decimator like me, I’m afraid I cant report on any positive growth – cajole or chide as you will, if a plant doesn’t want to grow, it simply wont. Give it to someone else, however, and it will flourish like … like a blasted nettle. It wont even need feeding, watering or pep talks, in someone else’s hands!

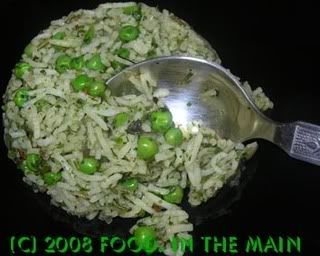
Anyway, since the mint is the only flourishing thing this year (despite being slowly decimated from underneath by greedy things not visible to my eye), I plucked a handful of mint leaves off the top and made minty peas pulao, which is my entry for Jai and Bee’s Grow Your Own event.
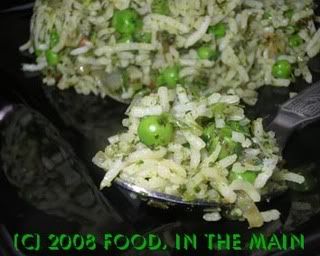
This peas pulao has minimal ingredients, so the fresh taste of the mint and coriander stand out. Damn, but it was nice to be able to go into my garden and just fetch me some mint - AND the coriander, too. Just call me Gardenin' Gal!
Recipe for: Minty peas pulao
Ingredients
4 cups basmati rice, cooked and cooled
1-1/2 cups peas, cooked
1 cup mint leaves, loosely packed
1/2 cup coriander leaves
1 large onion, minced
3-4 green chillies, minced
2 tbsp lemon juice
1 tsp cumin seeds
2 tbsp oil
Salt to taste
Method:
1. Grind the mint and coriander leaves to a fine paste with the lemon juice. Do this just before making this dish, not beforehand.
2. Heat the oil in a large pan, add the cumin seeds and green chillies and let fry for a minute.
3. Add the minced onion and fry till it begins to turn soft and brown.
4. Now add the ground mint-coriander paste and fry for a minute or so, stirring well, then add the peas.
5. Toss in the cooked rice and salt to taste, mix it all carefully with a large spoon, without breaking the rice grains.
6. Stir it about on medium heat till the rice is thoroughly warmed through. Serve hot with any raita.
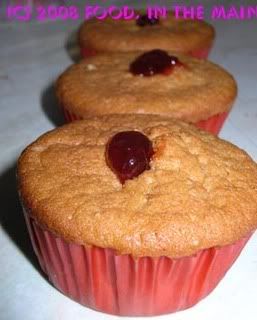
When a strawberry lover like me comes by the sheerest chance across a blog that showcases the most outrageously strawberry cupcakes, what choice is left but to bookmark the recipe, print it out, make a special trip to the supermarket to get strawberries specifically for the recipe, eat the strawberries with vanilla cream instead of making the recipe, postpone making the recipe because of a lack of strawberries, finally send the husband out to get more strawberries for the recipe, eat half of those strawberries as well, and at last make the cupcakes? No choice whatsoever.
If you like strawberries, these cupcakes are chock-full, brimming, absolutely awash in the taste and aroma and colour of these luscious berries. No strawberry lover could pass these up.
The instructions for the cupcakes are as per those on Mike’s Table, but the ingredients are halved in quantity. I didn’t use cream cheese for the frosting, because I don’t really like cream cheese frosting. I used a mascarpone-based icing instead. I didn’t think the cupcakes needed a heavy frosting, but that’s just my opinion. I also didn’t have any home-made strawberry-rhubarb jam, so I just used regular strawberry jam instead for the cupcake filling.
Recipe for: Mike's very strawberry cupcakes

Ingredients:
Cupcake batter
1 cup flour
1/2 cup sugar
1 egg
1/4 cup strawberry puree
1 tsp baking powder
1/8 tsp baking soda
1/4 cup butter
¼ + 1/8 cup buttermilk
1 tsp vanilla extract
Large pinch salt
1/4-3/4 cup strawberry jam, whisked to slightly runny
Mascarpone icing
1/2 cup mascarpone cheese, room temperature
1 tbsp butter, room temperature
1 tsp vanilla extract
1/8 cup strawberry puree
1/2 + 1/8 cups icing sugar
Beat together mascarpone and butter until well combined.
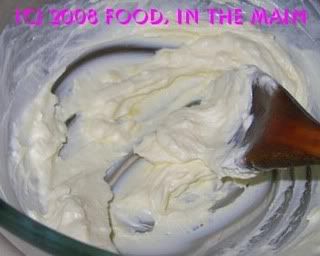
Beat in vanilla and strawberry puree.
Add in icing sugar, scraping down the bowl as you go. When it has all been incorporated, beat on high speed for 1-2 minutes, until icing is smooth. Place in the fridge till required.
Method:
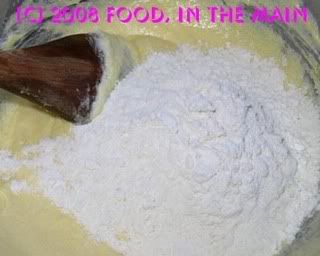
1. Sift the flour, baking powder, and baking soda into a bowl, and then mix salt into that. Set this aside.
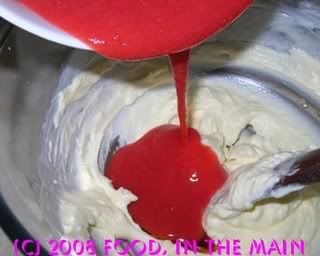
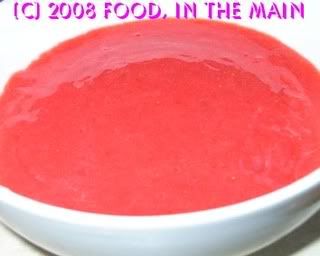
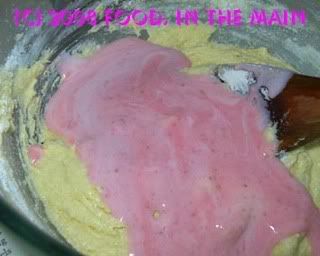
2. Hull, puree, and strain the strawberries to yield about 1/2 cup of puree (about 10 strawberries). Discard the seeds and any other solids remaining in the strainer.
Set 1/8 cup aside for the frosting and mix the remaining strawberry puree in a bowl with the buttermilk.

3. Preheat the oven to 170C.
4. Cream the butter and add in the sugar, mixing until the sugar has dissolved into the butter.

Then, add in the egg, mixing until fully integrated,
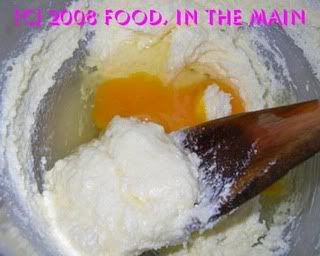
then finally mix in the vanilla.
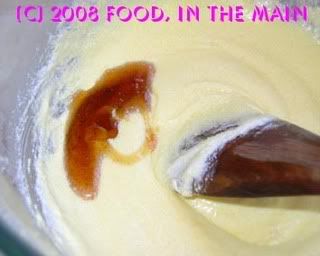
5. Add a third of the dry mix into the butter bowl and mix just until fully incorporated.
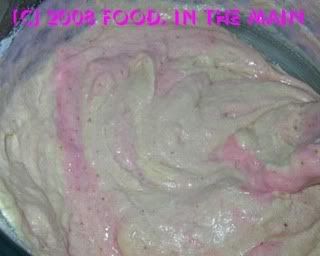
Then add a third of the buttermilk/strawberry bowl, mixing until incorporated.
Repeat until done.
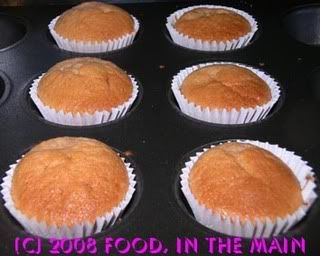
6. Now spoon the batter into paper linings in a muffin tray. Transfer this to the oven, and bake for about 20 minutes - but keep an eye on the cupcakes after about 15 minutes.
7. Once the cupcakes are done, give them a little time to cool and get them out of the pan.
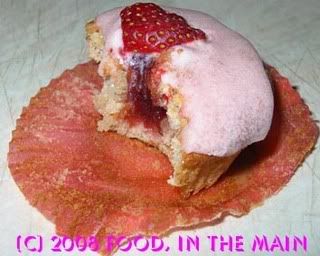
8. To fill the cupcakes with strawberry jam, what I did was poke a hole in the middle with a stiff drinking straw. Then I filled an icing bag with strawberry jam, fitted a medium nozzle on it and pushed the nozzle into the hole I'd made. Then I squirted the jam into it slowly, until I could feel the cake plump out, the I withdrew the nozzle carefully, still squeezing until the jam oozed a little from the top. (It doesnt HAVE to ooze, it just did for me!)
9. Take the icing out of the fridge, beat to smooth if required, then ice the cupcakes and decorate with sliced strawberries.
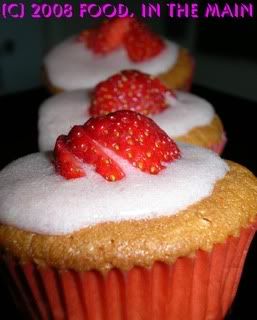
Wait for the icing to firm up before diving into the cupcakes.
(Putting them in the fridge for a bit speeds up this process.)
It’s only been a year and a half since the New York Times came out with Jim Lahey’s recipe for no-knead bread, and I guess I’m… ummmm… let’s see – yeah, absolutely bang on target for being possibly the last person on earth to hop on to the no-kneadwagon and join the teeming masses of all the other bakers and cookers and bloggers who have grown roots on that wagon from being there for so long.
I’m not going to bother with giving a recipe for no-knead bread on this post because there are hundreds out there - everybody and their pet dog has tried it and put up a post on their blog (or so it seemed when I went to look at reviews). Plus I’ve linked to the original recipe anyway.
About the recipe, all I will say is that I don’t do fractions (5/8th of a cup of water??? how much is that in normal person terms? Who on earth gives instructions in *irregular fractions anyway?), so I used 1-1/2 cups of water with 3 cups of flour to make the dough. It didn’t seem to affect the dough (not that I noticed) and I needed that amount anyway to get the flour to hold together.
The dough bubbled beautifully in its bowl, although when I turned it out on a floured surface, I had my doubts about whether it would pull together. But it did, beautifully. And then, after being shaped and placed on non-stick paper to rise for two hours, it rose beautifully.
I’m pretty certain that it would not have risen, though, were we not having very warm weather right now. I’m not a confident or enthusiastic baker of bread (due to past unsuccessful experiments where the yeast went on hartal and stubbornly refused to rise to anything, leave alone the occasion), so you can say this is pretty much the first time I’ve baked bread that was edible.
Actually it was MORE than edible, it was fantastic! The bread smelt incredibly good while baking, and the crust… oh the crust! It crackled while it cooled, just as all the recipes said, and it was crusty and gorgeously tasty. Pete was all ready to have a go at it the moment it came out of the oven, but I put up a barrier complete with yellow “Keep Out – this means YOU, Pete” tape all around it, so that it could sit undisturbed and cool for the requisite period of time. Which was meant to be an hour, really, but I could only manage 45 minutes before our self-control died an abrupt death.
Since Pete had been really very good about waiting for the bread despite being very hungry (he’d postponed his breakfast after smelling the bread baking, preferring to wait for fresh home-baked bread), I decided that it was only right that he do the honours and inaugurate my very first crusty loaf of beautifully rustic bread.

So now, ladies and gentlemen, for the first time since May 2005, I present to you all without further ado, the long-deferred debut of... Pete’s hands on Food, In The Main! And when I say that, I mean right after you read my disclaimer footnote!
* When I say “irregular fractions” I have no clue what it means in mathematical terms. Basically, to me, “regular” fractions are those that are etched on my measuring spoons and cups – 1/2, 3/4, 1/3, 1/4. Any weird fractions like 3/5, 5/8 and so on, that don’t show up on my measuring spoons and cups, are “irregular” as far as I’m concerned. Not only irregular, but downright weird. Any recipes that specify such abnormalities will have their instructions ignored. You have been told.
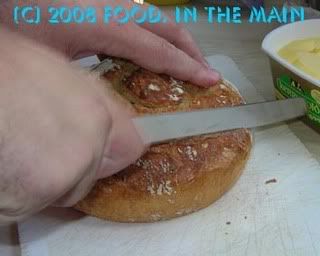
Ta-DAAAAAAAAAAA!
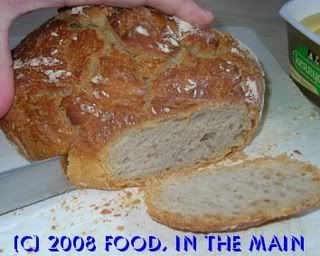
The ceremonial slicing of the loaf...
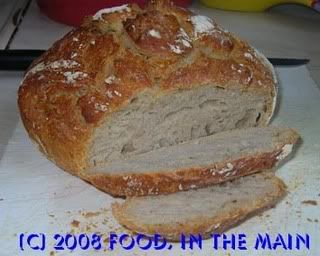
A no-hands view
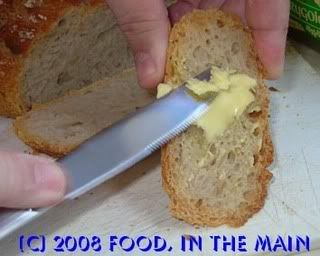
And finally, the slathering of the butter...mmm mmm MMMM!
The first time I tried nut roast was a few years ago, when we went for Sunday lunch with my father-in-law and his partner, in honour of his birthday, to a pub that he favours. Sunday lunch usually involves roast beef, lamb or turkey, sometimes chicken, along with a selection of steamed vegetables and roasted potatoes, and of course a jug of gravy.
Me being vegetarian, I had to go for the only veggie option there was in the Sunday lunch section – which was nut roast. I didn’t know what it was or what I was going to get, but to my pleasant surprise, it was delicious! I don’t know if they made the nut roast from scratch at the pub or whether it was just cooked from frozen, but it didn’t matter – it was absolutely scrummy. I never had it anywhere else and we never went to that pub except with my f-i-l, but every time we went there, that’s what I had. The nut roast.
I don’t know why I didn’t think to try making it at home… well, perhaps I do know. It’s probably because the nut roast, in my mind, was linked to a specific meal at a specific place on a specific date with specific people… (and does the word specific now look as weird to you as it does to me? Repetition causes confusion.)
My mother is going to spend Christmas with us this year, the first time that circumstances have made it possible for her to be with us. (People, there IS a point to this, I’m not digressing, and especially not digressing without reason!) She was wondering what she would be able to eat for Christmas dinner, since she doesn’t even eat eggs or anything containing eggs in any form, and whether it would be too much trouble to cook for just her alone. That’s when I had the brilliant idea – I would make a nut roast for the vegetarians in the family! (See, I TOLD you, there was a point and I just made it. Without going off on a tangent. [All you need for this to happen is get the moon and the stars in the correct alignment. NOW I’m digressing. Guess the moon and stars moved.])
Of course, I didnt want to make a nut roast on Christmas Eve and then have it flop, so the next thing to do was make it now, as an experiment. (If it didnt work, at least I wouldnt have ruined our meal for Christmas!) So, I researched nut roasts and discovered that the recipe is nicely forgiving, able to accommodate pretty much anything you throw into it. The recipe below is an amalgamation of 2-3 different ones, using ingredients I prefer (courgette not aubergine, for instance; wholewheat granary breadcrumbs instead of white, etc)... and omitting the eggs entirely.
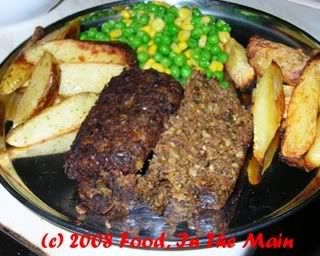
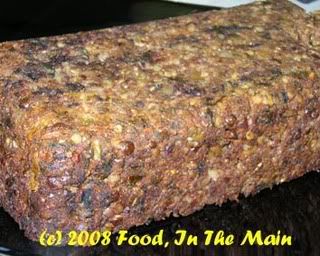
To my delight, the nut roast was as gorgeous as the one I'd had at the pub... the texture and taste were perfect. If it didnt quite hold together as well as it should have, I attribute it to the lack of egg as a "binder" (In hindsight, I should have added extra breadcrumbs). Not that I minded, and even Pete, despite good-naturedly grumbling about "too many vegetables", thought it was very tasty.
Hooray, I have a vegetarian roast recipe for Christmas! (Amma, take note.)
Recipe for: Nut roast
Ingredients:
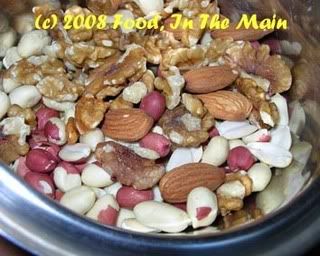
1 cup peanuts
½ cup walnuts
Handful cashews (about 10)
Handful almonds (about 10)

1 medium courgette
1 medium carrot
1 medium onion
1 bell pepper
1 cup button mushrooms
4 cloves garlic, minced
1/2 cup masoor dal (+ 2 tbsp whole masoor - optional)
2-3 dried birds eye chillies, minced (or use fresh green chillies to taste, minced)
2 cups fresh breadcrumbs (I used wholewheat granary bread)
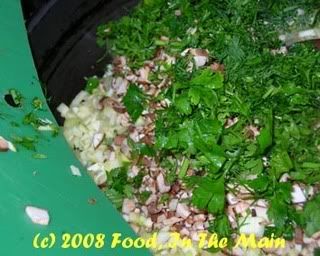
2 cups chopped herbs (combination of parsley, coriander and dill)
1 tsp dried thyme
3/4 tsp turmeric powder
1 tbsp dark soy sauce
2 tbsp Worcestershire sauce
2 tsp sunflower oil
1 tsp dried thyme
Salt and pepper to taste
Method:
1. Wash the masoor dal.
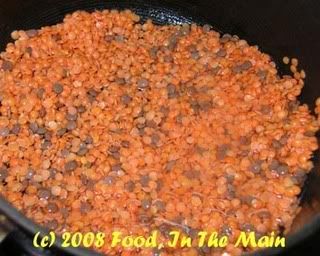
Cook in boiling water till done but not mushy.
The stove-top will do fine for this as masoor cooks very quickly, and you can keep track of its texture. Drain off the cooking water and reserve the cooked lentils.
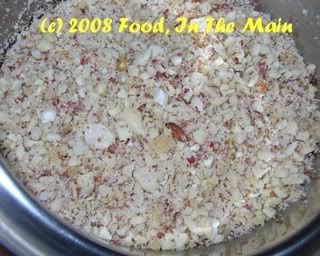
2. Chop the nuts finely (but not to a powder – just small pieces) in a food processor (or by hand if you have that sort of patience).
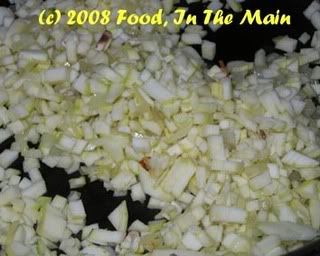
3. Peel and grate the carrot. Chop the courgette, onion, bell pepper and mushrooms very finely.
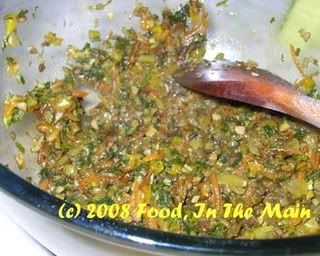
4. Heat the oil in a large, heavy bottomed pan and fry the onions, garlic and chillies till the onion is soft and brown.
5. Add the chopped herbs, dried thyme, turmeric powder, chopped courgettes and mushrooms now and stir well.
6. Cover the pan and let the vegetables cook for 4-5 minutes, then add the grated carrots and bell pepper.
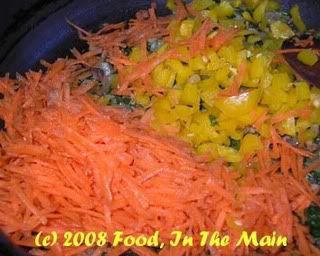
Saute for 7-10 minutes or till the vegetables are cooked.
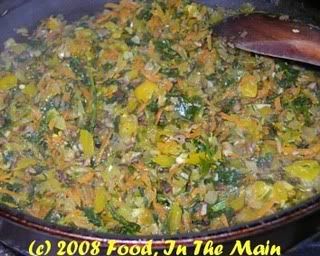
Transfer the vegetables to a big bowl and let cool.
7. Then add the soy sauce and Worcestershire sauce and mix in. Add a little salt (about ½ tsp) and 1 tsp freshly ground black pepper, the chopped nuts,
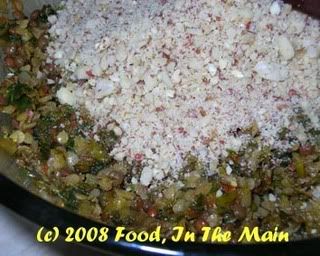
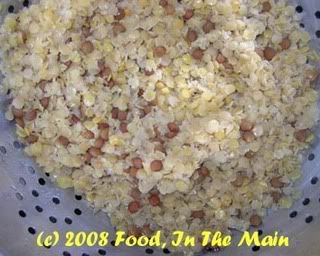
the cooked lentils
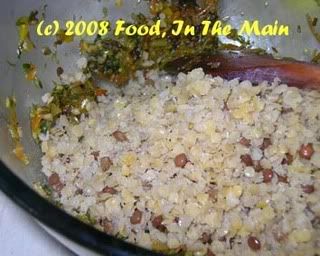
and the breadcrumbs

and mix it all with your hands to make a homogenous mixture
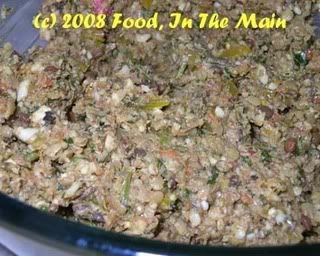
– it shouldn’t be dry but also don’t make it sloppy or runny, or the roast will not “set” in the oven. Also check for seasoning now and correct if necessary.
8. Pack the mixture tightly into a greased loaf tin,
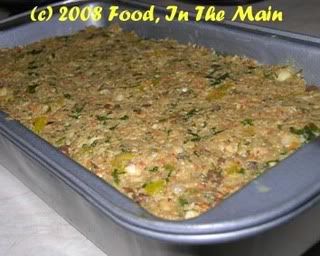
cover with foil

and bake for 45 minutes covered, at 180C. After that take the foil off, lower the temperature to 160C and cook uncovered for another 10 minutes. Turn the oven off and let the loaf rest for 5-10 minutes in the oven itself, before unmoulding onto a serving plate.
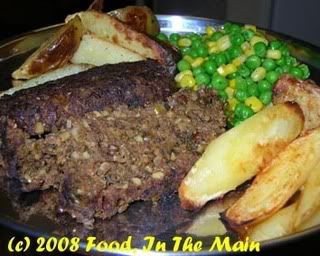
Serve thickly sliced with a selection of roasted and/or steamed vegetables.
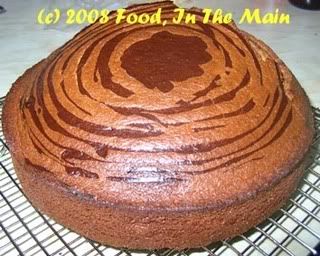
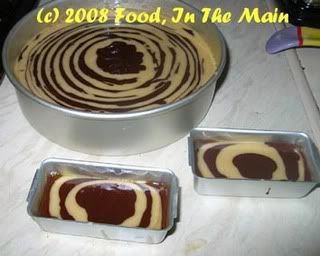
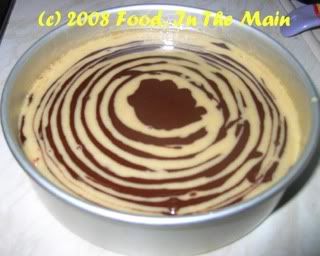
Relax, folks, this cake is just a zebra masquerading as a tiger :) I thought the "stripes" looked more tigerish than zebraesque, so I renamed it. What's in a name, after all.
Whoever thought up this technique was (is?) a genius in his or her own way. Such a simple thing to do, with such spectacular results (especially if done perfectly) - no fiddly procedures, no cutting cakes into shapes, or glueing them with icing or marzipan to construct edifices. Just two batters used alternately. Absolute genius, I tell you.
My cousin Hema and I made this cake - or rather, Hema made it under instructions. Normally I shy away from baking cakes that use more than two eggs - maximum 3 - but this time as I was instructing, it seemed better to follow the recipe exactly instead of improvising. (She can learn improvisation by herself!)
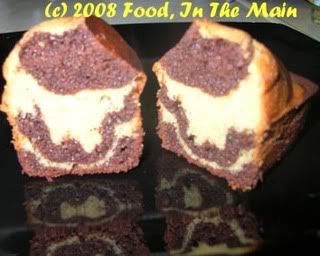
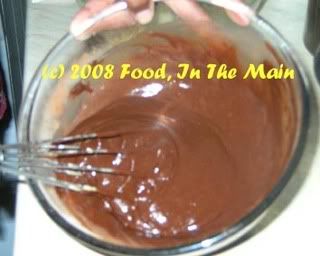
As it turned out, we should have gone with our instinct and "loosened" the chocolate batter which had become thicker than the plain one by addition of cocoa powder. Because we didnt do that in the first place, the first few layers of chocolate didnt fall easily off the spoon and didnt quite make it to the centre of the cake pan.
Oh well... live and learn. (The recipe below has the correct revised measurements.)
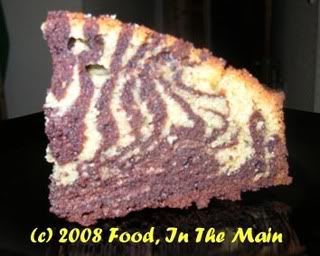
Despite our initial hiccup, the inside of the cake looked spectacular when cut.
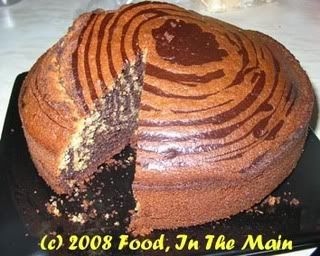
It had risen rather a lot on one side while baking - probably because the batter was not mixed quite right? - and I surreptitiously pushed it down (carefully!) with the heel of my hand when nobody was looking. Not too much and not too hard, though, because I didnt want to ruin it totally!
All in all, this is a nice cake and excellent for impressing your guests and making them think you're a baking genius!
Previous recipes baked with Hema: Peanut butter cookies, Cashew vanilla cookies, Cranberry orange cookies
Edited to add: Thanks, Divya, for pointing out that I'd said 1/2 tbsp cocoa powder, instead of 1/2 cup! 1/2 tbsp would have done no good at all! Thanks for being so observant! (Recipe has been updated) :)
Recipe for: Tiger cake
Ingredients:
4 eggs
1 cup sugar
1 cup milk
1 cup oil
1 tsp vanilla extract
2 cups plain flour
2 tsp baking powder
1/4 tsp salt
1/2 cup dark cocoa powder
Milk as required
Method:
1. In a large mixing bowl, combine eggs and sugar until creamy and light in colour.
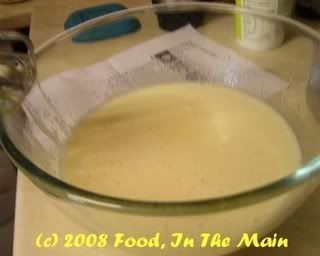
2. Add milk and oil and continue beating till well blended.
3. Add vanilla. Gradually add flour and then beat until the batter is smooth.
4. Divide mixture into 2 equal portions. Keep one portion plain.
5. Add cocoa powder to the other and mix well. Add enough milk to thin out the batter to the consistency of the plain portion.
6. Preheat oven to 180C. Scoop a ladle of plain batter into the middle of the baking pan.
7. Then scoop a ladle of the cocoa batter and pour it in the centre on top of the plain batter. Continue this way until the batters are finished. The more you "layer" them, the more stripes you will get in the finished cake.
Do NOT spread the batter or tilt the pan to distribute the mixture.
8. Bake for 40 minutes or till the cake tests done.