skip to main |
skip to sidebar
Reprinted from http://mydhaba.blogspot.com. Copyright © 2005 by VK Narayanan
I dont have a sweet tooth really, but once in a while I get this intense urge for a traditional dessert. Ok, dessert as such is not an Indian concept in the sense that sweets arent served separately at the end of a meal - they're usually part of it. Cakes, muffins and other western sweets and desserts are nice enough, but the rich creamy milky sweetness of kheer and payasam is something else again. The best part of it for me is the aroma of cardamom... warm, sweet, inviting and redolent of everything good!
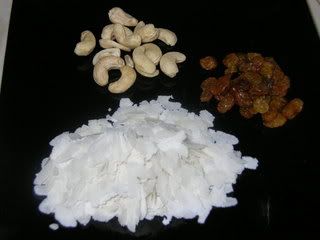
This recipe is courtesy of VKN of My Dhaba. I saw the recipe on his blog at just the right moment for the impulsive decision to make it rightaway. All I did was halve the quantity of ingredients. It seemed perfect, and it was - perfect in quantity, in simplicity and in taste. And best of all, it used ingredients that can be found at any given time in most Indian pantries - aval or poha (beaten rice), cardamom, milk, cashew nuts, ghee and raisins. Since aval is so easily cooked, there was no need for pressure-cooking or soaking anything.
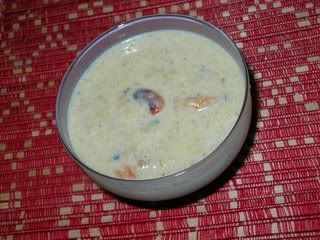
I absolutely LOVED this payasam. Of course, it could have been because I hadnt had any payasam in months and was really craving some, but I'm pretty sure that wasnt the only reason, or even the deciding one. The payasam was wonderful because of the recipe. The quantity turned out just right, too - just right for one greedy cook, that is. Two helpings and it was all gone. Mmmmm....
Recipe for: Aval payasam
Ingredients:
1/2 cup poha/aval (beaten rice)
1/4 cup sugar
1 cup hot milk
7-8 cashew nuts
Seeds of 3 cardamoms, finely powdered
3-4 strands saffron (optional), soaked for 10 minutes in 2 tbsp hot milk
1 tbsp raisins
1 tsp ghee
1-1/2 cups water
Method:
1. Heat the ghee in a pan and fry the cashewnuts to a golden colour. Remove from ghee and reserve.
2. Fry the raisins in the same pan until they're puffed and golden. Remove from ghee and reserve.
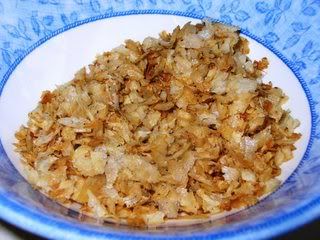
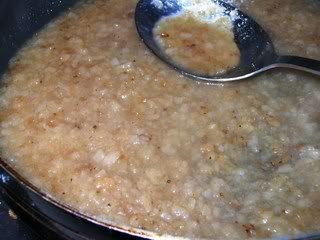
3. In the remaining ghee, fry the aval/poha till it turns crisp and golden brown. Remove and reserve.
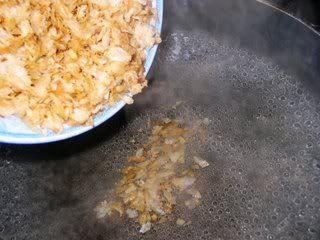
4. Add 1-1/2 cups water to the pan and bring it to a boil (I boiled the water in my kettle while frying the aval, to speed up things). Add the roasted aval/poha to it.
5. Simmer till the poha breaks down and becomes soft. Add the sugar and stir till dissolved.
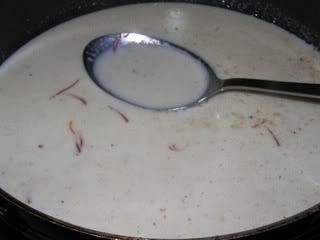
6. Now add the hot milk and the saffron-soaked milk to the poha and simmer over medium heat till it thickens. This should take about 10-12 minutes. Keep stirring often so that it doesnt form a skin on top.
7. Add the fried raisins, cashewnuts and cardamom powder, stir well, then turn off the heat.
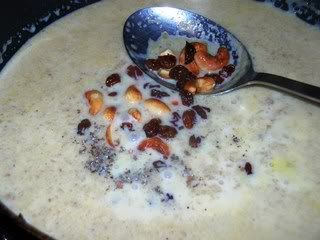
Let the payasam sit for 10 minutes. Serve warm or cold (if you can wait that long).
 I've been very tardy about putting up this post, but my excuse is that I didnt want to post about the parcel I received until MY parcel was in the post, on its way to its recipient. (And yes, I'm standing by that story.)
I got my BBM package about 4 days back, actually. There it was, sitting by the door when I got back from work. The moment I saw it, there was nothing to do but take it to the living room, plonk myself down on the carpet and open it up right then and there because I couldnt WAIT to see what the box contained! (Didnt even take the time out to kick off my shoes.)
Well, it wasnt literally right then and there, because I couldnt open it with my nails - the box was too well sellotaped. So I had to get up and get a pair of scissors. Sat down again to open the box, then realised that I didnt have my camera. So up I had to get again and get the camera so that I could record for posterity my very first BBM parcel ever! Being a food blogger is fun, and taking part in these foodie events is even MORE fun!
Anyway, my parcel was from Deb Schiff, of Here and There. No more waffling, here are the contents of my parcel:
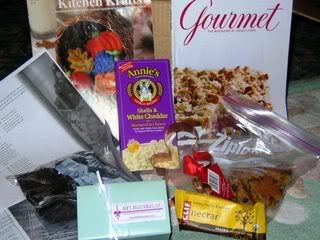
The carob brownies - oh, those brownies were TO DIE FOR! I've never ever EVER had such deeply darkly richly gooey brownies... and once Pete had had a taste, I damn near had to beat him off with a stick. They were the best brownies I've ever had and I wish I could make them that way. Deb was kind enough to include the recipe, but agave nectar is not available in the UK (unless you want to pay £15 for 100ml - which I think is extortionate even given that agave nectar has to be imported from Mexico or the US). However, I shall keep that recipe and treasure it... maybe one day I'll be able to make use of it!
Deb is a chocolatier - but she cant eat sugar or chocolate, I'm guessing because of an allergy. Included in the parcel was a cute little box of chocolates handcrafted by her, specially excluding coconut (as you can see, she went the extra mile for me!):

Those chocolates didnt last long either.
I had the last of the cookies today.
I ate the organic fruit-and-nut bar.
I damn near ate the Gourmet magazine, the Kitchen Kraft booklet and the two recipe sheets as well. (But I didnt. They're safe.)
Deb also included a gingerbread man cookie cutter with a request to "pass it on and start a new tradition" - but I couldnt do that (for reasons I wont disclose just yet) this time. However, I promise to send it on in the next BBM round, to whomever I'm assigned to send a parcel. On my honour, Deb! I'll keep the gingerbread guy safe till then. :)
And finally, thanks to Stephanie, the Happy Sorceress, for hosting this Blogging By Mail event. It's the first time I've participated in it, and it's been good fun. Now to wait and see what the recipient of MY parcel has to say...
I got the recipe for this bean casserole from the Allrecipes site (Recipe ID=49287) because it sounded so nice. The author of the recipe described the casserole as "delightful", but I sort of discounted that as creator's pride. Kind of the way I describe some of my recipes as "incredible" or "wonderful", even knowing that most people would not believe it until they tried the recipe for themselves! My verdict about any recipe is always AFTER I try it for myself. Wouldnt make sense otherwise, right? The proof of the pudding (or casserole, or whatever) and all that...

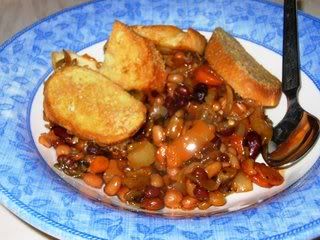
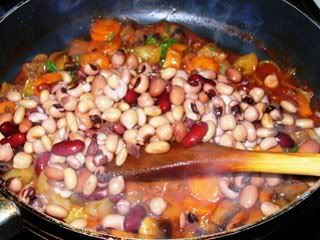
So I tried this recipe the other day, with a few slight changes - because of not having some ingredients handy, natch. It was a pleasant surprise to find out that the recipe originator hadnt oversold her submission! The casserole was different, incredibly (there I go!) tasty and flavourful - not to mention simple - that I consider it a staple. Lots of protein and veggies and carbs all in one go. I'm sure you can add whatever veggies you like, as well.
Dont just take my word for it, though. Try it and discover it for yourself. This is a delightful, wonderfully tasty casserole! In fact, it was so full of flavour that I didnt miss the lack of chillies in it. For me, that IS incredible.
Recipe for: Bean casserole
Ingredients:
4 tbsp olive oil
1 large onion, sliced
1 medium carrot, sliced 1/2 cm thick
2 cloves garlic, finely chopped
1 bell pepper, seeded and chopped
1 large mushroom (like portobella), chopped into chunks
1 tbsp all purpose flour
1/2 cup water
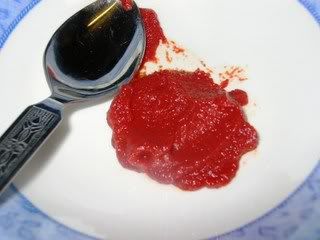
2 tbsp concentrated tomato paste
1 tsp white sugar
1/2 tsp dried basil
1/4 tsp dried thyme
1 tsp fresh thyme leaves, chopped
1 tbsp fresh basil leaves, chopped
1 can (450gm) can mixed beans (or use just one kind, whatever you have)
1 tsp fresh ground black pepper
1 medium loaf French bread, cut into 1/2 inch thick slices
1/4 cup grated parmesan cheeese
Method:
1. Preheat the oven to 220C.
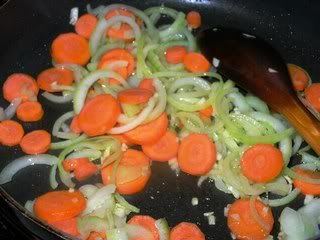
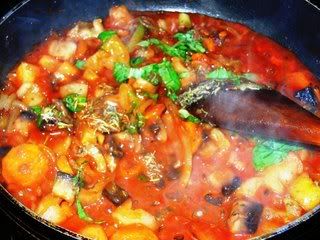
2. Heat 2 tbsp olive oil in a skillet over medium heat. Add the garlic, onions and carrots and cook till the onion is soft, stirring often.
3. Stir in the sugar, pepper and mushrooms and continue to cook till the onion is light brown.

4. Sprinkle the 1 tbsp flour over the vegetables and stir, cook for a minute.

5. Then mix in the water and tomato paste.
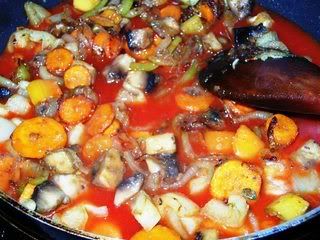
6. Mix in the beans and season with salt and pepper.
Stir in the dried herbs and fresh herbs.
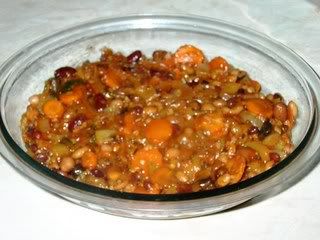
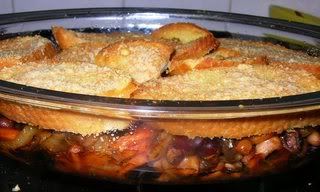
7. Stir well, then transfer to a lightly greased casserole dish. There should not be too much sauce, it should be quite thick.
8. Pour the remaining 2 tbsp olive oil in a dish. Dip one side of each slice of bread in the oil, then arrange on top of the casserole with the oiled slice facing up. Sprinkle over the parmesan cheese.
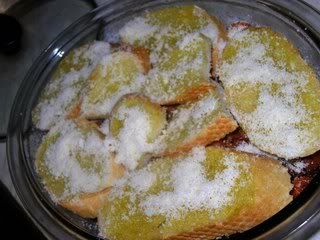
9. Bake for 12-15 minutes in the pre-heated oven, until the bread and cheese are toasted.
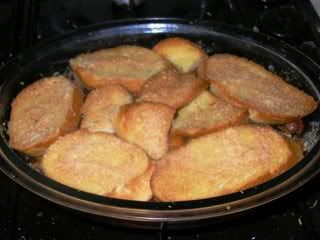
10. Serve hot, accompanied by a green salad.
I cant resist stopping to look at big colourful books that have lots of glossy photos of food - especially cookies and cakes and pies. And if said books are cheap, I certainly cant resist buying them. The only kind of baking books I havent bought - and wont - are the ones on fancy cakes and cake decorating, which IMHO are meant for master bakers (like Archana). I would like to be able to create masterpieces like that - but I know I dont have the drive or the patience. I'm content to admire, and BOY do I ever admire Archana's cakes! Also, if ever I baked cakes that look like works of art, I would most certainly resent anybody even touching them, much less slicing 'em up prior to shoving the art into their big gaping gobs! :)
Anyway, my most recent purchase was a giant book of cookies and muffins (The Great Big Cookie Book is the actual title). I dont really have the space to accommodate more books (of any kind, but ask me if that stops me buying them), so after I'd brought the A3 sized hardbound book home, sheer guilt drove me to try out a recipe from it, just to justify buying it.
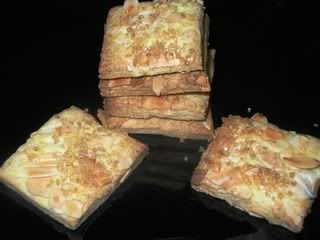
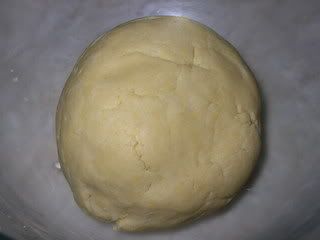
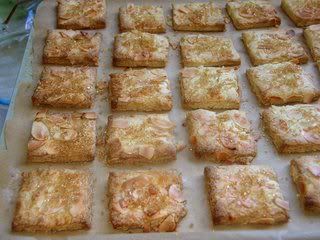
The photos of the almond cookies in the cookbook were mouth-watering, so I decided to try the almond cookie recipe. The recipe seemed simple enough on the face of it, but it turned out a little messier and a little more hard work than the book had indicated. As in, the dough in the book looked beautifully smooth and a perfect rectangle when rolled out (prior to cutting out shapes). Mine, on the other hand, had lots of cracks and did NOT roll out smoothly.
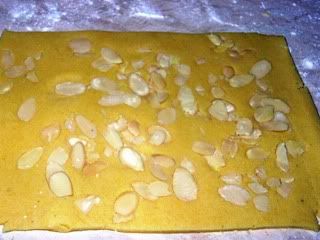
The recipe also said to sprinkle the sliced toasted almonds on the rolled out dough, then roll it out some more BEFORE cutting - not the best advice there, because it was not easy to cut through the almonds while retaining the shape of the cookies. I did the first batch the hard way, but for the second batch, I sprinkled the almonds on the cut squares. This was a bit time consuming but easier than what the book said.
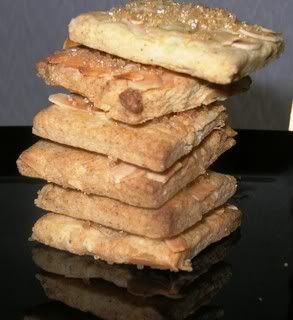
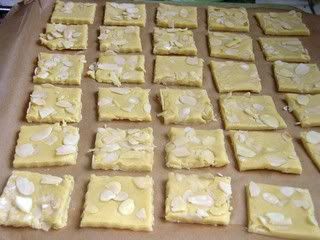
Note: If anybody looks at the photos and thinks "oh look, after all that b*tching she's still rolled out the dough neatly", I'm afraid I have to burst the bubble and admit to cheating - I used a pizza cutter to trim away the wonky edges. I also didnt bother cutting out shapes - re-rolling lots of trimmings is not my idea of a fun time, so I just cut the dough into squares with my trusty pizza cutter.
A bit fiddly to make, these almond cookies, but they tasted lovely. The one addition I would have made, in retrospect, is a few drops of almond essence. They would have added the perfect finishing touch to some rather pretty cookies!
Method for: Almond cookies
Ingredients:
1/4 cup cold butter or margarine, chopped
2-1/4 cups self-raising flour
1 cup caster sugar
1/4 cup demerara sugar (or regular sugar)
1/2 tsp ground cinnamon
1 large egg, separated
3-4 tbsp cold water (or as required)
1/2 cup flaked almonds
2 tsp almond essence (optional)
Method:
1. Preheat the oven to 180C. Whisk the egg white lightly and reserve.
2. Rub the butter/margarine into the flour until you get a breadcrumb texture.
3. Mix the cinnamon with the caster sugar and stir it into the flour mix.
4. Add the egg yolk to the flour, add two tbsp cold water to start with, and mix into a firm dough, adding more cold water as required. (Dont make the dough sticky with too much water, though.)
5. Roll out the dough on a lightly floured board until it is 1/2 cm thick. Trim the edges with a pizza cutter or a sharp knife so that the edges are straight.
6. Cut into squares or rectangles. Transfer carefully to cookie sheets lined with non-stick baking paper. The cookies wont spread, so leave about 1/2 cm gap between each.
7. Press in a few almond flakes carefully on each square, then carefully brush the tops of the biscuits with the whisked egg white, using a pastry brush.
8. Sprinkle over the demerara or regular sugar.
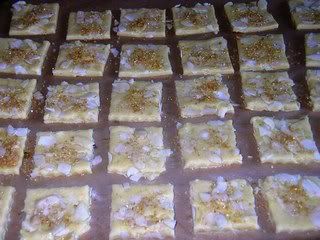
9. Bake the cookes for 12-15 minutes, until golden.
The cookies will be a little soft so remove them carefully onto wire racks. The cookies will harden as they cool.

10. The cookies keep well when stored in an airtight container.
What with one thing and another, I havent felt like posting anything on my blog for the last couple of weeks. I should be back in the next week or so - I have quite a backlog of recipes to write about. (Actually the backlog itself is daunting enough that I feel a bit desperate!) One thing, though... whether I post the recipes on my blog or not, I certainly havent stopped taking photos. It's like my camera is an essential part of my kitchen! Thanks for enquiring about my whereabouts, kind ladies (you know who you are, and I'm grateful for your concern). Just wanted to say I'm fine and will be back shortly! Thanks for keeping an eye on my blog despite the silence :)
Gosh, it's been a real struggle to put pen to paper - or fingertips to keyboard, if you will. One of those bouts of listlessness where nothing seems worthwhile, or easy... my entire being resisted the very thought of writing something, tapping out the recipe, uploading the photos, resizing them, placing them on the template - all of it seemed like too much hard work. Too much work at work and no energy for anything else, that was probably the cause.
But I'm feeling a little perkier today, because yesterday afternoon, my boss and the two other surveyors for whom I've been doing a HELLUVA lot of work these last 2 months, took me out to lunch to show their appreciation of my work. That was a nice gesture and I guess good deeds resonate outwards.
Another nice surprise was waiting for me when I got home today - a lovely home-made photo card from the even lovelier Meeta, of What's For Lunch Honey. And better yet, it was one of my favourite photos from the many many brilliant photos on her blog. This one:
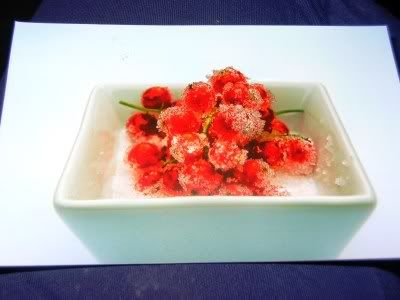
Thanks Meeta, you made my day!
Pass it forward, right? :)
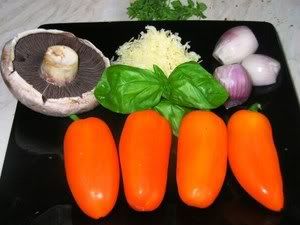
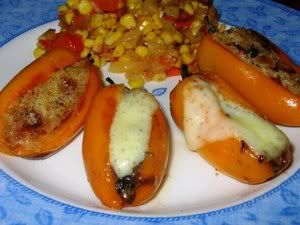
Recipe for: Stuffed baby peppers 2 - mushrooms and cheese
Ingredients:
4-6 baby peppers
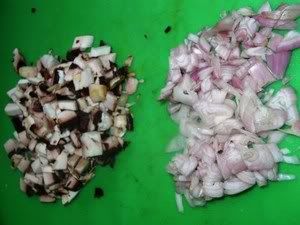
1/2 cup mushrooms, chopped
3-4 shallots, chopped fine
2 tbsp fresh basil leaves
1 tsp Worcestershire sauce
1 tsp chilli sauce
1 tsp oil
1/4 cup grated Danish Havarti cheese (or use any cheese you like)
5-6 slices of Jarlsberg cheese (or use any cheese you like)
Salt to taste
Method:
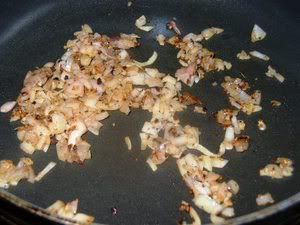
1. Heat the oil in a pan and fry the shallots in it till they turn soft.
2. Add the mushrooms and stir for a minute or so, then add the basil leaves.
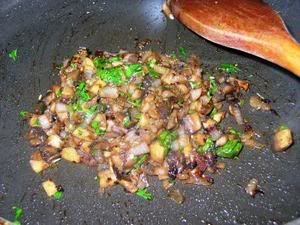
3. Add the Worcester and chilli sauces and stir well. Taste for salt.
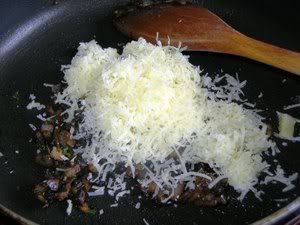
4. Cool the mix, then stir in the grated cheese. Reserve.
5. Prepare the peppers as detailed here and fill carefully with the mushroom-cheese stuffing.
6. Place the stuffed peppers on a tray, slit side down, spray with olive oil mist, and bake for 12 minutes or so at 180C, or until the peppers begin to acquire light brown spots.
7. Turn over the peppers, place a slice of Jarlsberg cheese over the slit and place back in the oven till the cheese melts (2 minutes or so).
8. Serve warm.