Friday, June 30, 2006

Veppilakatti - chutney powder made with lemon/lime leaves

At last, the recipe for veppilakatti, which I was waiting to get from my mother. Like she says, I wonder why it's called "veppilakatti" when the recipe doesnt call for neem leaves (veppilai) in the recipe... but hey, I have no quarrels with the eccentricities of any language, especially if I dont have to write any exams in it!

I dont have any hope of ever getting to make veppilakatti here, because I cant get the required leaves... but here goes the recipe for those who are lucky enough to have lemon/lime trees growing in their gardens and are interested in making this very different, very tasty chutney powder. The recipe is nearly word-for-word as my mother emailed it - I've only added the English translations where required.

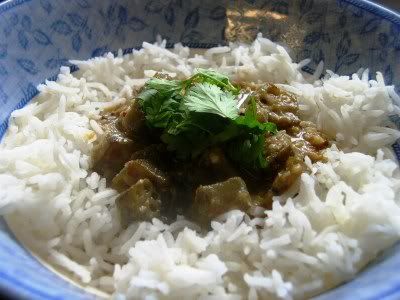
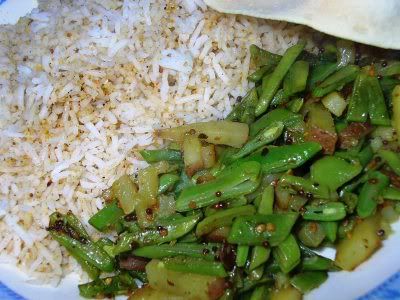
It's really best eaten as a side-dish for thayir-sadham (curd rice). I havent tried it with anything else and wouldnt want to. There speaks the purist in me. Or maybe it's the fuss-budget. It all depends on the point-of-view concerned. (Yes, there are other personalities residing in this one body, but they usually dont get a chance to express themselves. It's safer that way. For all of us, and for all of you!)

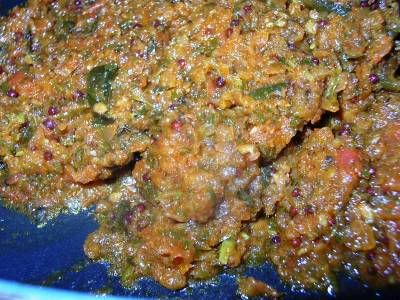
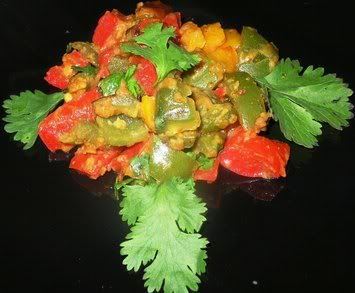
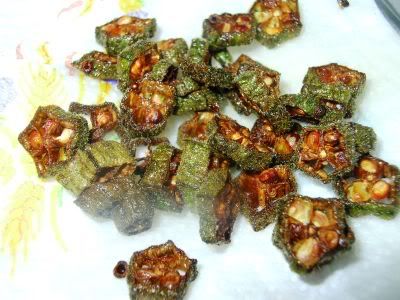
Recipe for:
Veppilakatti
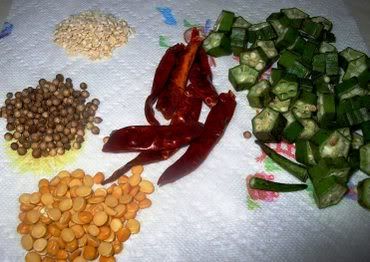


Ingredients:

Lemon/lime leaves (tender leaves r better) - 4 cups
10-15 curry leaves (for extra flavour)
omam (ajwain or carom seeds) - 1 tsp
jeera (cumin) - 1/4 tsp
black peppercorns - 5-6 corns
red chilli - 3
lemon juice - as reqd
salt - as reqd
urad dal - 1 tsp fried (optional)

Method:

1. Wash and dry the leaves on a cloth.

2. Take out the middle vein from the leaf after folding it (vertically). If the leaves are very tender, no need to do that.

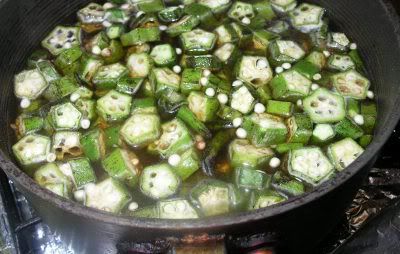
3. Put everything (except the lemon juice) in a dry grinder, grind the till the leaves are nicely powdered.

4. Take the powder out & add lemon juice to taste. Mix well.

Store in a refrigerator for a longer shelf-life. (Amma made some for me in mid-May and it is still going strong.)

Tuesday, June 27, 2006

ARF/5-a-day #26 - Colourful vermicelli upma

When I came across these wildly colourful vermicelli the last time I went to Birmingham (a fwe months ago) I couldnt resist buying them. (Have I mentioned that I'm a sucker for pretty colours?) I intended using them straightaway, but as often happens, I didnt get around to it, and the packet got shoved to the back of the cupboard. I rediscovered the pack when rootling about in the back of the bottom-most shelf for something else - cant remember what right now. Which reminds me, whatever it was, I still havent found it. (Reminder to self: Look for whatever-it-is and find it.)


Anyway, having rediscovered the colourful vermicelli, I decided I would try out
Ammani's recipe for semiya upma which would also be perfect for this week's ARF/5-a-day event.

I've tried making this upma before, but always ended up with an amorphous mass of vermicelli. Tasty enough, but not particularly friendly to look at. Certainly not the type of thing that you would let anybody but yourself have a look at, for fear of reactions like "ewwww... what's THAT?" or "You're gonna EAT it??" or "who yarked into your pan?".

To get back to the point - I'd had Ammani's recipe with me for ages, and it seemed a good time to follow her instructions and see if I ended up with a photogenic AND appetising result. In a nutshell, I did.

Ammani also gave me a tip for salvaging the upma in case it was drowning in too much water. Here's the tip verbatim: "If you've added too much water and think that the upma might get all gloopy, then add some 'cous cous' to the lot and keep stirring on high flame. Just before turning off the heat, add butter/oil. My mom-in-law is the undisputed queen of semiya upma. And that's her (not-so) secret trick."

I didnt have to follow that tip this time, but I thought I'd put it on my blog (just in case), with many thanks to Ammani and her mother-in-law.

PS. While the upma cooked away gently, I picked up the packet of vermicelli to look at the "free" recipe printed on the side. "Vanilla flavoured vermicelli", it said. Oooops! No wonder the recipe was for a kheer (pudding). I sniffed at the uncooked vermicelli but couldnt really make out much, so I decided that the upma would not register any vanilla flavour. Luckily I was right. Phew! That should teach me to read the nutrition facts and other information on food items before using/buying them.

PPS. I guess I'll have to try making a colourful kheer next.

Recipe for:
Colourful vermicelli upma


Ingredients:

1 cup vermicelli (colourful or otherwise, broken into 2" pieces)
1 small potato, diced small
1 small onion, chopped fine
1 small carrot, diced small
1/2 cup peas
(you can also add other vegetables - green beans, cauliflower, aubergine, etc)
2 green chillies (or to taste), minced


I used only one of those carrots!

2 tsp mustard seeds
2 tsp urad dal
2 tsp chana dal
7 cashewnuts, broken into pieces
4-5 curry leaves, roughly torn
1/4 tsp asafoetida powder (optional)
1 tsp cumin powder
1 tsp coriander powder
2 tsp + 1 tbsp oil
Salt to taste
1.5 to 2 cups water
1 tbsp chopped fresh coriander leaves for garnish

Method:

1. Heat 2 tsp oil in a pan and fry the vermicelli till it turns a light brown. Set aside.

2. In the same pan, heat the remaining 1 tbsp oil and put in the mustard seeds. Cover and let them pop.

3. Then add the green chillies, dals, curry leaves, asafoetida powder and cashew nuts and stir till the nuts and dals begin to turn a light brown.

4. Now add the onions and saute till they become translucent, then add the chopped vegetables. Dont add the peas yet, especially if they're very tender. Saute for 6-7 minutes, or until the vegetables are half cooked.

5. Pour in 1.5 cups water along with the coriander and cumin powder. Stir well and bring the water to a boil, then let it simmer for 5 minutes or till the vegetables are nearly cooked.

6. Now add the fried vermicelli and the green peas along with salt. Keep stirring until the water is absorbed, on high heat. If the vermicelli is still not quite cooked, add the remaining half cup water and continue stirring till done. There should not be any water remaining.

7. Garnish with coriander and serve hot with coconut chutney.

Monday, June 26, 2006

Tomato-coriander thokku (chutney)

This is a variation of tomato thokku that I make when I have coriander to spare - it's an intensely flavoured chutney that is yummy on buttered toast. I use it as a base for sandwiches made with plain buttered bread - or with cucumber slices, shredded carrots and lettuce. And it goes without saying (even though I'm saying it) that it's a great accompaniment for dosas and idlis and mixed with rice to make instant tomato rice. It stays good in the refrigerator for up to two weeks, if stored in an airtight container, and if you make sure that you only use a clean, dry spoon.

Recipe for:
Tomato-coriander thokku (chutney)


Tomato-coriander thokku and (right) tomato rice made with the thokku

Ingredients:

6-8 medium tomatoes, quartered
1/2 cup fresh coriander leaves
1 tsp coriander powder
3/4 tsp cumin powder
1/4 tsp asafoetida powder
1/2 tsp fenugreek seeds, dry roasted, cooled and powdered
2 tsp mustard seeds
2 tsp red chilli powder (or to taste)
5-6 curry leaves, torn roughly
3-4 tbsp oil
Salt to taste

Method:

1. Puree the quartered tomatoes along with the coriander leaves until well blended.
Reserve.

2. In a pan, heat the oil. Add the curry leaves, asafoetida powder, cumin powder, coriander powder and mustard seeds. Cover the let the seeds pop (about 30 seconds).

3. Now lower the heat and add the red chilli powder, stir quickly, then pour in the pureed tomatoes.


4. Stir well to mix. Turn up the heat to medium-high and let the mixture simmer, stirring occasionally, until it reduces down to a thick mass and the water content has evaporated.


5. Add the powdered fenugreek and salt to taste. Mix in well, and let the chutney cook for another 2-3 minutes.

6. Let cool and store in an airtight jar. Storing in the refrigerator will extend its shelf life to two weeks.


Friday, June 23, 2006

Savoury Cheddar cheese biscuits

I started off by wanting to make some simply gorgeous looking biscuits that I stumbled across on a German blog - Teatime. Specifically, these biscuits. It's been a long time since I've tested my rusty German, but I thought that translating what seemed like a fairly simple recipe would not tax my Deutschkenntnisse (command of German) ;)

I could have been wrong, though. The recipe as such was simple as simple can be, but I'm not sure if I got the proportions quite right. Also, some cross-cultural nuances didnt quite make it through - I mean, how much exactly is "1/2 Päckchen Backpulver"? I figured it should be about 1 tsp baking powder, so that's how much I used.

Apart from that, since I didnt have Gouda or Emmental cheese at hand, I used Mature Cheddar. And since I couldnt find my black cumin seeds anywhere (I confess I didnt look very hard), I used kalonji (nigella seeds) instead. So by the time I'd finished substituting the ingredients called for in the recipe with what I had at hand, I realised that only my desire to try out the original actually remained unchanged. Well, they say it's the thought that counts...

Anyway, as I was saying, I might have got the proportions of the oil-butter combination wrong, because my dough was alarmingly drippy by the time I'd mixed it all together. Ok, it was mostly healthy olive oil with about a tbsp of butter, but still, it seemed one heck of a lot of the stuff for the amount of dough there was. I've reduced the oil content in the following recipe by about a third.

The biscuits turned out pretty tasty, though (and why wouldnt they with so much oil to work with!). I only used about 1 tbsp of kalonji, but I'd probably increase it to 2-3 tbsp, as their flavour ended up quite mild. Then again, I used sharp mature Cheddar, which is way more overpowering than mild Emmentaler cheese. I guess experimentation is the name of the game!

Recipe for:
Savoury Cheddar cheese biscuits


Ingredients:

1-1/2 cups flour
2 tbsp nigella seeds
1/3 cup olive oil + 1 tbsp unsalted butter, melted
100-150 gm Cheddar cheese, grated
1 whole egg + 1 separated (add eggwhite to dough, use yolk for brushing biscuits before baking)
1 tsp baking powder
Salt to taste

Method:

1. Beat the separated eggyolk lightly and set aside.

2. Preheat the oven to 170C.

3. In a medium bowl, mix the flour, nigella seeds, olive oil and butter, cheese, whole egg and the egg white along with salt to make a smooth dough. Let the dough rest for 5 minutes covered.

4. Roll out the dough on a clean surface (use silicone paper to make rolling out and cleaning up easy) and cut out round shapes with a biscuit cutter. Re-roll out the remaining dough and proceed the same way until the dough it used up.

5. Transfer the circles to a silicone paper-lined baking tray. The biscuits wont spread so 1/2" space between them is enough. Lightly brush the tops of the biscuits with the beaten egg yolk.


6. Bake for 20-25 minutes in the oven, or until the biscuits are golden. Let cool in the oven for 10 minutes, then remove and let them cool completely.

The biscuits make a nice snack, and they can also be served with soup.

Thursday, June 22, 2006

How to separate an egg

Easy - use this:


What a nifty little gadget for separating eggs - the yolk settles neatly into the round dip in the middle, and the white slithers through the two slits in the sides.


Believe it or not, I've been a separator-virgin all these years, avoiding any recipes that call for segregation of the contents of an egg ("Whites only, no yellows please"). It just seemed so heartless to me, separating the two in a ham-handed operation that resulted in yolkshed as often as not... it made me feel like it was the British Raj all over again. Forced partition, in other words.

Until I bought this separator. Now it's just SO easy. No violence required, no unnecessary yolkshed. Just a peaceful departure of the whites, leaving behind the yellow. Anything for a simple life!

'Confessions in Groups of Five' Meme

Vaishali from Happy Burp tagged me for this meme. Since I've probably already repeated myself regarding why I like memes, I'll skip that step and go to the meme straightaway! :)

5 items in my freezer

- Bags of fresh frozen peas. How I love the lil green guys!
- Frozen blueberries
- Frozen herbs
- Two "freezer" mugs (double-layered with water between, which freezes to ice and keeps drinks cold)
- Rather a lot of ice

5 items in my closet

- Many old handbags + a couple of new ones
- Too many old souvenir t-shirts that are faded from wear but will not be thrown away until they actually fall to bits!
- Lots of hangers with covers knitted by my kind mother-in-law.
- 5 sarees and 1 salwar kameez, none of which I wear here except for formal occasions which thankfully are very rare
-

5 items in my car

I dont have a car but for the purposes of this meme, Pete's car can be considered mine! :)
- Pen, lip balm, sunglasses
- Coins - annoying ten pence, two pence and pennies which hardly ever get used but keep accumulating.
- Emergency coats, picnic rug
- Mobile phone charger
- UK road atlas

5 items in my purse

- Lip balm
- Credit card, debit card, emergency cash
- Coins (50p, £1, £2) and emergency £10 note
- Migraine tablets
- Library card

I'd like to tag
Annita of My Treasure, My Pleasure, Karthi, of Kitchenmate and Mika, of The Green Jackfruit. As always, anyone else who wants to do this meme, consider yourself tagged :) Those who've been tagged here, only do it if you want to!

Wednesday, June 21, 2006

Happiness is...


Veppilakatti made by my mother, eaten with tempered curd rice. Heaven!


Recipe for veppilakatti, for those who are interested, will follow courtesy my mother.

Happiness is...


A bowl of fresh Cajun spiced popcorn shared with my Pete :)

This "Happiness is..." series has been started by
Ammani, of Chaipani. Feel free to pay it forward! :)

Wednesday, June 14, 2006

'10 dishes I miss the most' meme

I was tagged by the lady whose spice is always right - Garam Masala - for this meme. :) Thanks, GM!

I like how memes and quizzes help you get to know other bloggers better, even if you've never met them - and especially as you might never meet them in person. Reading about their recipes is one thing, but to know more about their background, about what inspires or moves them... those are the sort of details that interest me almost as much as new recipes.

This meme in particular resonated with me. I know I cook quite well, but I never enjoy my cooking as much as I do my mother's. I suppose that would be pretty much the case with pretty much everybody!

Anyhow, here are the 10 things that I miss of my mom's cooking. I guess they should be in order, but they're not. I miss them all, anyway!

1. Veppilakatti - A fragrant chutney powder made from tender leaves picked from lemon trees. It takes a lot of leaves to make a decent amount of the powder, and they HAVE to be tender, so this is a very rare preparation.

2. Melt-in-the-mouth mysorepak - a simple yet festive sweet made with sugar, gram flour and ghee.

3. Aviyal - a mixed vegetable medley made with coconut, tamarind and a bit of buttermilk.

4. Poricha kuzhambu with coconut thogayal - A family favourite.

5. Thengai kuzhambu with green plantain curry - Simple everyday food that me and my siblings could die for.

6. Kozhakattai - Steamed riceflour dumplings with a filling of coconut sweetened with jaggery and cardamom, usually made for the Ganesh chathurthi festival.

7. Filter coffee - Pete would vouch for this as well.

8. Savoury mango pachadi - usually made with pickled baby mangoes that have gone soft and squidgy and would not be eaten any other way. Waste not, want not!

9. Karuveppilai podi - Chutney powder made with curry leaves. Yum!

10. Any kalanda sadham - Lemon rice, tamarind rice, coconut rice. Especially curd rice that has been jazzed up with fried mustard seeds, cashews, curry leaves and best of all, mor milagai (chillies soaked in buttermilk and sun-dried).

Damn, gotta add one more - Semiya payasam (vermicelli pudding).

Dont want to impose this meme on anyone, but it would be great if
Ammani of Chaipani, Nupur of One Hot Stove, Mika of Green Jackfruit, and Meeta of What's for lunch Honey could find the time to take part! :)

Tuesday, June 13, 2006

ARF/5-a-day #24 - Easy bell pepper curry

This is a really simple, quick recipe for when you want a vegetable side-dish for chapaties. Depending on the amount of red chilli powder you use to season it, it can be fiery hot but with an undercurrent of sweetness from the bell peppers - or it can be mellow with a hint of heat. I like it either way.


Using ripe peppers (red, yellow, orange) increases the sweetness but I like them because the end result looks so darn pretty.


This is also my entry for ARF/5-a-day #24 hosted by
Cate

Recipe for:
Easy bell pepper curry


Ingredients:

4 medium bell peppers, seeded and chopped
3 tbsp gram flour (chickpea flour)
1 tsp sesame seeds
1 tsp mustard seeds
1/4 tsp asafoetida powder
4-5 curry leaves, torn
2 tsp oil

1/4 tsp fenugreek seeds, coarsely powdered
1/2 tsp red chilli powder (or to taste)
1/2 tsp sugar
Salt to taste
1 tbsp coriander leaves, chopped, for garnish

Method:

1. Heat the oil in a pan. Add the mustard seeds, sesame seeds, asafoetida powder, curry leaves and cover till the seeds pop (30 seconds).


2. Add the red chilli powder and crushed fenugreek seeds and stir, then add the chopped peppers and stir again till they are well coated with the tempering.


3. Sprinkle over the gram flour and sugar.


4. Keeping the heat on high, mix in the gram flour and stir-fry on high for about 2 minutes.

5. Then cover the pan, turn the heat down to low and cook covered for 7-10 minutes or till the peppers are softened but not soggy.


6. Add salt to taste, stir it in and sprinkle with the coriander leaves. Serve hot with chapaties and a dal.

Monday, June 12, 2006

There, it's done.


Click the photo for a larger image


This is what I was working on for the last two weeks and a bit, somewhat neglecting everything else that needed doing! :) It's finished now.... at least until the urge to begin another project becomes too insistent to ignore.

Bell pepper sambar

Mmm mmm MMMMM! The aroma of this sambar as it cooks is heavenly. Sambar can have any vegetable or any combination of vegetables used as thaan - I dont have an English equivalent for that Tamil word, but basically it refers to whatever vegetable is used to make the sambar. But there are a few vegetables that take the concept of sambar aroma to new heights of anticipatory salivation - call them the Niagara-makers of the mouth, if you will. (I anticipate that most of you wont, and even I wouldnt had I not come up with the phrase myself. It IS a bit ick, as similes go, but... you'll know what I MEAN, right?) Of course, that Niagara quality can happen with any any dish you're fond of, from any cuisine, while it's being cooked!


Anyway, where was I? Oh yeah, the vegetables that raise the status of an everyday sambar... well, IMHO, and not in any particular order, they are: Bell peppers, drumsticks (not the dead fowl kind) and okra. I'm sure everybody will have their favourite veggies - it would be nice to know who loves what best! - and I havent forgotten the ubiquitous onion. But those three vegetables dont need the support of onions to make a great sambar. In fact, I dont add onions when I use any of my three faves - it would be like gilding a (scented) lily.

Recipe for:
Bell pepper sambar


Ingredients:

1 tsp tamarind paste, dissolved in 4 cups water
1 cup cooked mashed tuvar/toor dal
2 green bell peppers (capsicum), de-seeded and chopped
2 medium tomatoes, chopped
2 htsp sambar powder
2 tsp mustard seeds
5-6 curry leaves
2 tsp oil
1/4 tsp asafoetida powder
3-4 dried red chillies
Salt to taste
1 tbsp cornflour/riceflour/wheat flour
2 tbsp fresh coriander leaves, torn, for garnish

Method:

1. Heat the oil in a pan. Add the mustard seeds, asafoetida powder, curry leaves and dried red chillies. Fry for about 30 seconds, or until the seeds finish popping.

2. Add the bell peppers and tomatoes and stir-fry on high for 2 minutes. Then add the sambar powder and stir for a minute more.

3. Turn down the heat and pour in the tamarind water. Stir well. Turn back the heat to high, and let the mixture come to a bubbling boil.

4. Now turn down the heat again and simmer the liquid till the bell peppers are soft and cooked and the tomatoes have broken down.

5. Dissolve the cornflour/rice flour/wheat flour in a little water and mix it with the mashed dal to make a pourable but thick paste.

6. Add this paste to the simmering liquid, along with salt to taste, and stir well, making sure there are no lumps.

7. Let the sambar simmer for 5-6 minutes longer, it should not be watery. Turn off the heat and cover the pan. Let the sambar rest for a few hours to let the flavours meld.


8. Just before serving, re-heat the sambar well, add the fresh coriander leaves and serve hot over rice with any vegetable curry. It is also perfect as an accompaniment for dosas, idlis and vadais.

Friday, June 09, 2006

Vendakkai pitla (Okra "stew")

This is another of those traditional handed-down-from-grandma recipes that my mother makes and that I cant seem to duplicate, no matter what. Oh, I'm sure it turns out just fine, because after all it's her recipe that I follow. But somehow, that extra infusion - of taste, of aroma - doesnt seem to happen for me.

There is a word in Tamil to define that elusive whatever-it-is that adds oomph to everyday food - kaimanam. The closest translation of that word is "aroma of the hand". Anybody who cooks probably acquires that quality to some degree, but there arent many who can evoke that feeling of warm contentment (home, family, food) in persons other than immediate family. As far as I'm concerned, anybody who can do that deserves the ultimate accolade. Fancy chefs with their fancy cooking dont hold a candle to all those unknown, unremarked yet fabulous home cooks out there.

Ok, returning from the high realms of philosophy, I'm dedicating this entry to
Anthony's Curry Mela this week (Week No 21). He does a terrific job of rounding up all the entries from various blogs, making it really convenient for lazy people like me to see who's been making what during the week!

The week before last, I left a note on his blog to say that I would try to contribute a recipe to his weekly round-up of recipes. Daft thing to do, because of COURSE circumstances ensured that I not only did not manage to keep that promise, but I also didnt get to write anything substantial that week. In hindsight, I shouldnt have made an open promise like that - Fate tends to keep an ear out just so she can scupper any plans :)

Anyway, Tony, here's my entry for your Curry Mela this week, and thanks for your efforts!

Recipe for:
Vendakkai pitla (Okra "stew")


Ingredients:

2 cups sliced okra
1/2 cup cooked mashed tuvar/toor dal
1 tsp tamarind paste dissolved in 3 cups water
1/4 tsp turmeric powder
Salt to taste

For the masala paste:


2 tsp urad dal
2 tsp chana dal
4-5 dried red chillies or to taste
2 tbsp fresh grated coconut
3 tsp coriander seeds
2 tbsp warm water

For tempering:

1 tsp oil
2 tsp mustard seeds
1/4 tsp asafoetida powder (optional)
4-5 fresh or dry curry leaves, torn

Method:

1. Grind the first four masala ingredients to a smooth paste with 2 tbsp water. Then add the coriander seeds and grind agin until the seeds are crushed but not smoothly ground. Reserve.

2. Cook the okra in the tamarind water till done but not mushy. (Skim off any froth that rises.)


3. Blend the masala, turmeric powder and cooked tuvar/toor dal with 1/2 cup water in a bowl, making sure there are no lumps.

4. Add this to the cooked okra along with salt to taste and stir carefully to mix without breaking up the okra pieces. Let the pitla simmer for 5 minutes while you do the tempering.

5. For the tempering, heat the oil in a small pan. Pop the mustard seeds (cover the pan) for about 30 seconds on high haet, then lower the heat and add the asafoetida powder and curry leaves.


6. After 10 seconds, pour the tempering immediately on the pitla and stir it in. Serve hot over rice, accompanied by a raita and papad.

Wednesday, June 07, 2006

Okra pachiri/raita

This is one of my favourite pachiri/raita recipes. Actually there's hardly enough to the process to call it a proper recipe, but there isnt a better word!


Basically, fry a couple of handfuls of thin-sliced okra in oil, till crisp and browny-green. Mix with seasoning and fresh thick yogurt as an accompaniment to any pulao or spicy rice dish. There, that's it. BUT, because this is a food blog and more importantly, because I took photos, I have to use 'em. So here they are.

PS. Dont mix the crisp okra with the yogurt till required, or they will become soggy.

Recipe for:
Okra pachiri/raita


Ingredients:

One cup fresh okra, sliced into 1/2cm rounds
1 cup fresh thick yogurt whisked with 2-3 tbsp water (I used Greek yogurt)
1 tsp any podi (molagapodi/paruppupodi) OR 1/4 tsp garam masala OR 1/4 tsp sambar powder
A pinch or two of freshly ground black peppercorns
Salt to taste
1 tsp chopped coriander leaves for garnish

Method:

1. Deep fry the okra in a smal pan till browny-green and crisp. Drain on kitchen paper.


2. Whisk the podi/masala with the yogurt, add salt to taste.

3. Just before serving, mix the fried okra with the yogurt, sprinkle with the coriander leaves. Serve at once as an accompaniment for biryani or pulao or any spicy rice dish.

Tuesday, June 06, 2006

ARF/5-a-Day #23 - Orange-carrot cake

Discovery over the past week: There isnt enough time in a day to do everything I want to, especially as a large chunk of it is taken up by the working hours to which I'm forced to adhere. I'd like to read, watch my favourite TV shows (usually sitcoms and/or documentaries), write about my recent US trip for my travel blog, sort the (hundreds of) photos from said US trip and put them online, go blog-hopping in the fascinating world of food blogs, do the gardening while the weather's good, do the cooking, work on my embroidery and go cycling. (Less important things like vacuuming or doing/putting away the laundry dont figure on my list.) As you can see, it's a little difficult to cram all that into the 5 or 6 hours I have between getting home from work and going to bed. It might SEEM like a lot of time but believe me, it isnt.

Since I cant do all the above simultaneously, some of them inevitably take a back seat. At the moment, since I'm on an embroidery kick, anything to do with computers (writing, blogging, blog-hopping, photo-sorting) doesnt get done. So, what I've been doing since my last post on this blog is watching TV and working on my embroidery. (It's halfway to finished, to be fair - and I might be tempted to post a photo of it when it's done, if I think it deserves publicity!)

Anyhow, I havent put up any new posts and already it's Tuesday and time for ARF/5-a-Day hosted by
Cate. This time, instead of something savoury, I'm going to post the recipe for a carrot-and-orange cake. The original recipe was off the Internet and I do wish I could remember where I got it. (I copied it during pre-blog days, when attribution wasnt necessary. Who knew I'd be writing about those recipes online! Note to self: Remember to copy source at all times.) In any case, I've tweaked it enough for it to be a hybrid now.

It's a very comforting sort of cake - because of some of the desi ingredients, the aroma and taste are tantalisingly reminiscent of Indian mithai (sweets), yet it is very definitely a cake that will appeal to Western palates.


I'm putting this cake forward for the ARF event because it contains carrots, fresh orange juice, nuts and buttermilk - all good ingredients!

The original recipe called for dark brown sugar. What I had was molasses sugar, which is infinitely darker and richer in taste than regular brown sugar. It probably made a huge difference to the aroma and flavour, I dunno. I had a hell of a time getting the lumps out of it (should have done that BEFORE adding it to the eggs and oil) but it was worth the effort, really.

One last thing - I used cream cheese frosting to fill the cake, but it would have been moist and tasty enough (and sweet enough) to hold its own even without any frosting. Next time I wont bother with the frosting - serving it with thick sweetened whipped cream will be more than enough! Also, this makes a BIG cake.

On with the show!

Recipe for:
Orange-carrot cake


Ingredients:

1 generous tbsp ghee
1 cup oil
1 cup dark brown sugar (I used molasses sugar)
2 large eggs
1 tbsp vanilla essence
grated rind 2 oranges
4 tbsp orange juice
3 cups grated carrot
3/4 cup sultanas
1/4 cup halved pistachio nuts and chopped pecan nuts
3 cups flour
1 tbsp mixed spice
1/2 tsp powdered cardamom seeds
2 tsp baking powder
1 tsp baking soda
1 cup buttermilk (if you dont have buttermilk, use 1/2 cup yogurt, 1/2 cup water)

Frosting:

200g cream cheese
1 cup icing sugar
2 tsp vanilla extract

Method:

1. Heat the oven to 160C. Grease a 10" square or round baking pan with Pam or other spray and line the bottom with non-stick paper.

2. In a large bowl beat together the oil, sugar, eggs, vanilla essence and orange rind.

3. Next, add the grated carrot, orange juice, sultanas and nuts.

4. Sift together the flour, mixed spice, cardamom powder, baking powder and soda and stir into the batter along with the buttermilk. Transfer to the prepared baking pan.


5. Bake at 160oC for 60-70 minutes or until a skewer inserted in the middle comes out clean.


6. Cool the cake in the tin for 10 minutes before turning out onto a cake rack. Let it cool completely, then split the cake horizontally in half.

7. For the frosting, beat the cream with the icing sugar and vanilla essence until smooth.

8. Spread the frosting on the bottom layer, then replace the top half of the cake.


9. Dust with vanilla sugar or sifted icing sugar.


Saturday, June 03, 2006

Runner beans with red potatoes

Runner beans are the nearest equivalent, taste-wise, of the hyacinth beans that I so love and havent found anywhere but (so far) in Southampton. Pete dislikes them, for some reason, so I usually make this dish for myself.


The best part of these beans is that they are "stringless" - so there's no need to de-string them (well, duh). Sometimes I add fried onions to these (perfect as a side for chapaties) and sometimes I use potatoes - as I did this time. In fact it was very nearly a painless preparation because I microwaved the vegetables together, then did the seasoning in a pan and sauteed them for a few minutes. Healthy AND tasty. Not to mention simple.

Recipe for:
Runner beans with red potatoes


Runner beans with red potatoes, here shown with paruppu podi sadham

Ingredients:

2 cups thinly sliced runner beans
1 cup red potatoes, sliced to approximately the same size


For seasoning:

2 tsp mustard seeds
2 tsp urad dal
1 tsp red chilli powder (adjust to taste)
1 tsp coriander powder
1/2 tsp cumin seeds whole
1 tsp garlic, sliced into very thin matchsticks
1/2 tsp garam masala
1/2 tsp asafoetida powder (optional)
2 tsp oil

Salt to taste

Method:

1. Cook the sliced beans and potatoes covered in the microwave for 8-10 minutes or till done.


2. Heat 1 tsp oil in a pan and add the mustard seeds. Let them pop, then add the cumin seeds, garlic and urad dal. Fry, stirring, till the dal becomes a light brown -about 30 seconds.

3. Add the coriander powder, red chilli powder and asafoetida powder now and mix well on low heat.

4. Now put in the cooked vegetables and stir well so that they are coated with the spices.

5. Pour the remaining tsp of oil around the veg and turn the heat up to medium-high. Fry for 5-6 minutes, or till some of the potatoes begin to get a brown tinge.

6. Add salt to taste, stir well. Serve hot with rice and any sambar/kuzhambu, pickles and poppadum.